S3 109 Safari project......

This site contains affiliate links for which LandyZone may be compensated if you make a purchase.
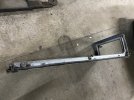
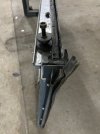
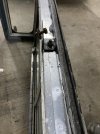
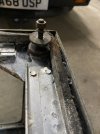
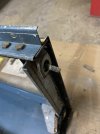
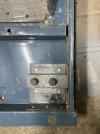
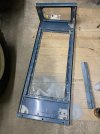
After some delays due to holidays, I managed to make some progress on the internal panels. I was dreading fitting the seat box, as I could see that there was a slight bend on the rear rail. It must have happened when I riveted it together. However, after some tweaking, I managed to get the seatbox to fit. I had to open up some holes for some more clearance. I used some dum dum sealer on the base flange and made some rubber gaskets for between the seat box and the chassis brackets. I think it looks a reasonably good fit. I also bought some second hand inertia reel bulkhead brackets, repaired, blasted and painted them. You can see them fitted with the reel mounting plate on top. Making some progress now!
 

Attachments

  • IMG_9141.jpeg
    IMG_9141.jpeg
    314.5 KB · Views: 67
  • IMG_9144.jpeg
    IMG_9144.jpeg
    334.7 KB · Views: 74
  • IMG_9145.jpeg
    IMG_9145.jpeg
    305.4 KB · Views: 69
  • IMG_9146.jpeg
    IMG_9146.jpeg
    268.5 KB · Views: 73
  • IMG_9147.jpeg
    IMG_9147.jpeg
    222.7 KB · Views: 72
Happy with progress ,I moved onto the tunnel and floor panels. I fitted some wiring to the reverse light switch and fed it through into the engine bay for connection later as I think it may be a real challenge to get in to after the tunnel is fitted. I applied some dum dum on the passengers floor and on the tunnel. Not sure if it needs it but Land Rovers don’t need an excuse to leak!
It still needs a bit of tweaking, but it seems to be quite a decent fit.
 

Attachments

  • IMG_9156.jpeg
    IMG_9156.jpeg
    269.7 KB · Views: 71
I thought I would try a front door on, so fitted the hinges and gave it a try. As you can see it’s a mile out!
I expected this, but not by that much…. Anyway, it could do with the bulkhead aligning as the chassis bracket is not fitted. I’ll try and get it better next time 😊
 

Attachments

  • IMG_9158.jpeg
    IMG_9158.jpeg
    285.8 KB · Views: 73
  • IMG_9159.jpeg
    IMG_9159.jpeg
    299.5 KB · Views: 71
I thought I would try a front door on, so fitted the hinges and gave it a try. As you can see it’s a mile out!
I expected this, but not by that much…. Anyway, it could do with the bulkhead aligning as the chassis bracket is not fitted. I’ll try and get it better next time 😊
That's looking amazing, and it's all really coming together now 👍
 
Moved over to the other side and fitted the driver’s side floor. Sounds easy, but took a fair bit of fettling to get it to sit properly! Anyway, I got it in and sealed it with dum dum the same as the other side.
After that nightmare, I thought I would brave trial fitting the driver side front door 😀. Surprisingly, it fitted fairly well straight away. Once the seals are in place, I think it will be better again…..🤞.
I’ve got tons to do, but I think I will move onto stripping the rear body sides ready for paint along with the roof. Dreading that one!
 

Attachments

  • IMG_9183.jpeg
    IMG_9183.jpeg
    277.4 KB · Views: 70
  • IMG_9184.jpeg
    IMG_9184.jpeg
    297.3 KB · Views: 62
  • IMG_9185.jpeg
    IMG_9185.jpeg
    350.6 KB · Views: 56
Moved over to the other side and fitted the driver’s side floor. Sounds easy, but took a fair bit of fettling to get it to sit properly! Anyway, I got it in and sealed it with dum dum the same as the other side.
After that nightmare, I thought I would brave trial fitting the driver side front door 😀. Surprisingly, it fitted fairly well straight away. Once the seals are in place, I think it will be better again…..🤞.
I’ve got tons to do, but I think I will move onto stripping the rear body sides ready for paint along with the roof. Dreading that one!
Brings back memories, I rebuilt a couple of SWB series.
Looks great
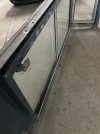
 
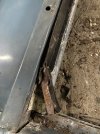
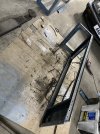
Started stripping one of the rear upper body sides, and it was not a job I was looking forward to!
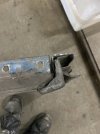
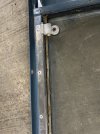
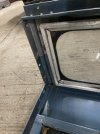
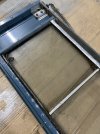
The first issue was that the sliding channels were so bad that I couldn’t slide the windows to get access to the fixing screws. I had to resort to bending the edge of the channel over then squeezing the window out. Nerve wracking to say the least! After getting both panes of glass out, I had to destroy the channels to remove them. Onto the drip channel, I unbolted it first then had to lever it out to unstick the sealant which has left an utter mess that I’ll have to clean off before preparing for paint.
I also started removing the rear window glazing strip screws and only a few came out before rounding the heads. Time to walk away I think…..😂
I’ll add some photos of it stripped when my patience returns 👍
 

Attachments

  • IMG_9271.jpeg
    IMG_9271.jpeg
    291.2 KB · Views: 53
  • IMG_9270.jpeg
    IMG_9270.jpeg
    257.8 KB · Views: 61
  • IMG_9269.jpeg
    IMG_9269.jpeg
    269.7 KB · Views: 58
  • IMG_9268.jpeg
    IMG_9268.jpeg
    392.5 KB · Views: 58
  • IMG_9267.jpeg
    IMG_9267.jpeg
    309.9 KB · Views: 56
  • IMG_9266.jpeg
    IMG_9266.jpeg
    289.2 KB · Views: 62
  • IMG_9265.jpeg
    IMG_9265.jpeg
    360.8 KB · Views: 58
  • IMG_9264.jpeg
    IMG_9264.jpeg
    371.8 KB · Views: 65
  • IMG_9263.jpeg
    IMG_9263.jpeg
    370.2 KB · Views: 54
  • IMG_9262.jpeg
    IMG_9262.jpeg
    238.4 KB · Views: 67
  • IMG_9255.jpeg
    IMG_9255.jpeg
    388.9 KB · Views: 60
  • IMG_9256.jpeg
    IMG_9256.jpeg
    323.1 KB · Views: 54
  • IMG_9257.jpeg
    IMG_9257.jpeg
    322.1 KB · Views: 58
  • IMG_9258.jpeg
    IMG_9258.jpeg
    407.5 KB · Views: 59
  • IMG_9259.jpeg
    IMG_9259.jpeg
    236.9 KB · Views: 58
  • IMG_9260.jpeg
    IMG_9260.jpeg
    281.5 KB · Views: 54
  • IMG_9261.jpeg
    IMG_9261.jpeg
    291 KB · Views: 56
  • IMG_9272.jpeg
    IMG_9272.jpeg
    353.2 KB · Views: 60
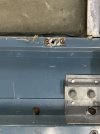
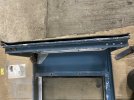
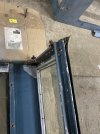
After walking away from the strip down yesterday, I went back for more today….😀. Next up, I removed all the mounting brackets, then tried the the rear window glazing strips again. The tiny cross head screws were burred over and were impossible to remove, so I had to drill the heads off then unscrew the remains with a pair of pliers. Oh joy, but that’s it done, on that one anyway! The glass came out fine as it was only in with dum dum…
After this one was stripped, I moved to the opposite side and after learning the lessons from the first attempt, it all came apart not too bad. 👍. It just needs some prep work, cleaning and shipping off for paint. Sounds easy if you say it quick enough…
 

Attachments

  • IMG_9293.jpeg
    IMG_9293.jpeg
    507.3 KB · Views: 49
  • IMG_9292.jpeg
    IMG_9292.jpeg
    349.3 KB · Views: 50
  • IMG_9291.jpeg
    IMG_9291.jpeg
    313 KB · Views: 54
  • IMG_9290.jpeg
    IMG_9290.jpeg
    345.3 KB · Views: 48
  • IMG_9289.jpeg
    IMG_9289.jpeg
    449.6 KB · Views: 56
  • IMG_9288.jpeg
    IMG_9288.jpeg
    390.5 KB · Views: 47
  • IMG_9287.jpeg
    IMG_9287.jpeg
    424.6 KB · Views: 48
  • IMG_9286.jpeg
    IMG_9286.jpeg
    220.4 KB · Views: 57
  • IMG_9285.jpeg
    IMG_9285.jpeg
    378 KB · Views: 47
  • IMG_9284.jpeg
    IMG_9284.jpeg
    406.2 KB · Views: 48
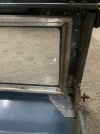
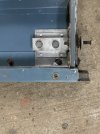
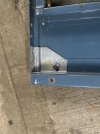
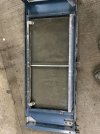
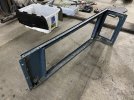
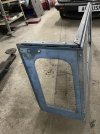
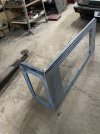
Next up, I had a look at the radiator front panel, and it’s a lot more ropey that I remembered. Not sure where I can go with this! I have a repair section for it, so I guess that would be a start!
 

Attachments

  • IMG_9295.jpeg
    IMG_9295.jpeg
    380.8 KB · Views: 51
  • IMG_9294.jpeg
    IMG_9294.jpeg
    392.5 KB · Views: 52
Okay, made a start on the front panel today. I had a look at others for sale and mine didn’t seem too bad considering. I also had a repair panel, so it was definitely viable.
After drilling the bonnet landing strip rivets and unbolting everything else, I could see the challenge ahead!
 

Attachments

  • IMG_9352.jpeg
    IMG_9352.jpeg
    560.8 KB · Views: 42
  • IMG_9353.jpeg
    IMG_9353.jpeg
    602.3 KB · Views: 40
  • IMG_9354.jpeg
    IMG_9354.jpeg
    663.1 KB · Views: 44
After carefully measuring the new repair panel, I cut the old remnants of the lower panel off. Incidentally, I never realised that there was a reinforcement on the old panel but not on the new one….
 

Attachments

  • IMG_9355.jpeg
    IMG_9355.jpeg
    683.7 KB · Views: 44
I carefully drilled off the old section, then chiselled it off using a slitting chisel. After a tidy up I drilled the new metal ready for plug welds. After a few tweaks, I welded the rear and front. It looks easy, but I can guarantee it was not! It was twisting all over the place 😀
 

Attachments

  • IMG_9357.jpeg
    IMG_9357.jpeg
    476.3 KB · Views: 45
  • IMG_9358.jpeg
    IMG_9358.jpeg
    607.9 KB · Views: 51
Luckily I had some steel angle leftover from chassis repairs. It was perfect to recreate the original strengthener with some trimming and drilling. Unfortunately the original was too far gone for reuse, otherwise it would have made sense to try and refit it.
After drilling plug weld holes on both faces I welded it into place. It really makes a difference and I’m glad I went to the trouble of fitting it as it would have been easier not to. 😀
 

Attachments

  • IMG_9359.jpeg
    IMG_9359.jpeg
    739.2 KB · Views: 49
  • IMG_9360.jpeg
    IMG_9360.jpeg
    680.7 KB · Views: 44
  • IMG_9361.jpeg
    IMG_9361.jpeg
    731.1 KB · Views: 47
  • IMG_9362.jpeg
    IMG_9362.jpeg
    600.5 KB · Views: 47
  • IMG_9364.jpeg
    IMG_9364.jpeg
    570.7 KB · Views: 49
Back
Top