S3 109 Safari project......

This site contains affiliate links for which LandyZone may be compensated if you make a purchase.
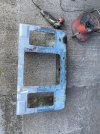
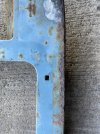
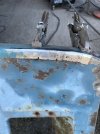
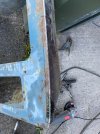
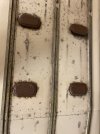
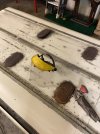
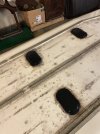
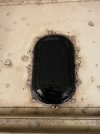
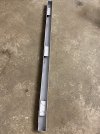
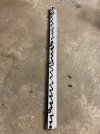
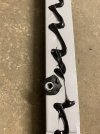
I removed the old hasp that held the bonnet down cleaned up the holes and welded them up. I’m not planning on using it again!
 

Attachments

  • IMG_9365.jpeg
    IMG_9365.jpeg
    415.3 KB · Views: 70
  • IMG_9366.jpeg
    IMG_9366.jpeg
    415.4 KB · Views: 72
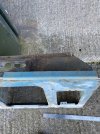
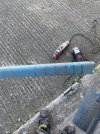
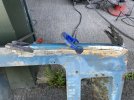
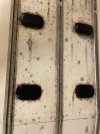
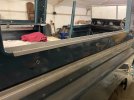
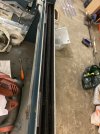
One disappointing point of the repair panel is that they don’t have return lips on the front faces to replicate the original , and that just annoys me! So, I cut some flat steel plate to size and bent it to shape and after some faffing around welded it. I managed to melt the raw edge into the new metal and put a bevel on it with the grinder. Not sure what will do with the other edges. I’ll sleep on it…..😀
 

Attachments

  • IMG_9373.jpeg
    IMG_9373.jpeg
    655.5 KB · Views: 73
  • IMG_9374.jpeg
    IMG_9374.jpeg
    618.5 KB · Views: 71
  • IMG_9375.jpeg
    IMG_9375.jpeg
    627.6 KB · Views: 64
  • IMG_9377.jpeg
    IMG_9377.jpeg
    704 KB · Views: 61
  • IMG_9378.jpeg
    IMG_9378.jpeg
    656.4 KB · Views: 66
  • IMG_9379.jpeg
    IMG_9379.jpeg
    722.8 KB · Views: 64
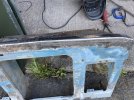
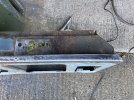
Okay, wee update for today on the front panel. I had a look at the landing angle on the top of the panel, and there appears to be fairly serious rust in that area. It must be where the rain drops track under the front of the bonnet and sits under the bonnet rest strip happily rusting away! 😀
Anyway I cut out the worst section on the right hand side, folded up a repair section and welded it in.
 

Attachments

  • IMG_9425.jpeg
    IMG_9425.jpeg
    709.8 KB · Views: 68
  • IMG_9426.jpeg
    IMG_9426.jpeg
    459.4 KB · Views: 55
  • IMG_9427.jpeg
    IMG_9427.jpeg
    522.5 KB · Views: 70
  • IMG_9428.jpeg
    IMG_9428.jpeg
    752.8 KB · Views: 62
  • IMG_9429.jpeg
    IMG_9429.jpeg
    333.4 KB · Views: 65
  • IMG_9430.jpeg
    IMG_9430.jpeg
    393.4 KB · Views: 63
  • IMG_9431.jpeg
    IMG_9431.jpeg
    390.6 KB · Views: 64
  • IMG_9432.jpeg
    IMG_9432.jpeg
    434.4 KB · Views: 69
  • IMG_9433.jpeg
    IMG_9433.jpeg
    550.4 KB · Views: 60
  • IMG_9434.jpeg
    IMG_9434.jpeg
    627.4 KB · Views: 63
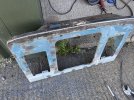
After trying to clean the rust and old paint off the front, I thought another solution was required, as the work to clean it satisfactorily would be really messy and would take forever 😟….
 

Attachments

  • IMG_9435.jpeg
    IMG_9435.jpeg
    592.9 KB · Views: 69
  • IMG_9436.jpeg
    IMG_9436.jpeg
    627.6 KB · Views: 68
  • IMG_9437.jpeg
    IMG_9437.jpeg
    418.4 KB · Views: 68
  • IMG_9438.jpeg
    IMG_9438.jpeg
    630.5 KB · Views: 74
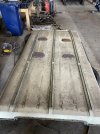
Step forward my new solution - get someone else to do it! 😂… Joking aside, this is definitely the best way to go… I took it to a local chap who refurbishes wheels, and he acid dipped and blasted it. There is no way on earth I would get it as clean as that! I’m so impressed I think I will give him a few other blasting jobs that would just take forever. I will paint it with Kurust first then get it filled, flatted and ready for painting.
 

Attachments

  • IMG_9521.jpeg
    IMG_9521.jpeg
    531.1 KB · Views: 76
  • IMG_9520.jpeg
    IMG_9520.jpeg
    433.4 KB · Views: 68
  • IMG_9519.jpeg
    IMG_9519.jpeg
    423.1 KB · Views: 68
  • IMG_9518.jpeg
    IMG_9518.jpeg
    437.2 KB · Views: 71
  • IMG_9517.jpeg
    IMG_9517.jpeg
    565.8 KB · Views: 72
I have the front panel a good coat of Kurust then where the filler work is needed on the front, I gave it a dusting of primer. Next job is to fill and flat until it’s ready for painting.
 

Attachments

  • IMG_9562.jpeg
    IMG_9562.jpeg
    432.8 KB · Views: 74
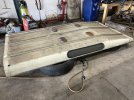
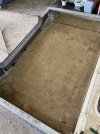
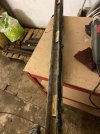
I stripped down the seat frames and rails to send them for blasting and powder coating and found on of the frames was corroded at the corner and holed. I thought a local repair would be sufficient as the rest was in good condition. In hindsight, a full repair section might have been neater, but it’s done now 😊.
 

Attachments

  • IMG_9554.jpeg
    IMG_9554.jpeg
    748.2 KB · Views: 50
  • IMG_9555.jpeg
    IMG_9555.jpeg
    707 KB · Views: 56
  • IMG_9556.jpeg
    IMG_9556.jpeg
    809.7 KB · Views: 64
  • IMG_9557.jpeg
    IMG_9557.jpeg
    838.9 KB · Views: 53
  • IMG_9558.jpeg
    IMG_9558.jpeg
    708.1 KB · Views: 66
  • IMG_9559.jpeg
    IMG_9559.jpeg
    802.1 KB · Views: 64
  • IMG_9560.jpeg
    IMG_9560.jpeg
    742.6 KB · Views: 60
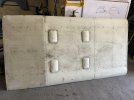
With everything going on with my garage upheaval, I thought it would take my mind off it all by picking up my freshly painted front panel. Great to see it painted at least. A step in the right direction 😀.
 

Attachments

  • IMG_9882.jpeg
    IMG_9882.jpeg
    385.8 KB · Views: 52
  • IMG_9883.jpeg
    IMG_9883.jpeg
    492.2 KB · Views: 47
a good job on that important bit, should last a long while now, have you got a new premises arranged of a good size , I’d hate having to move from my garage with all the junk in it and it’s just a normal size
 
a good job on that important bit, should last a long while now, have you got a new premises arranged of a good size , I’d hate having to move from my garage with all the junk in it and it’s just a normal size
Thanks - yes it’s been a real job sifting out nearly 20 years of ‘stuff’ and I’ve had to be ruthless to make even a dent in it! Many runs to the recycling and scrap man later and I’m making some progress. I managed to sell my cars and ramp, but obviously held onto the Landy 😀. It’s been quite cathartic in some ways but challenging considering all the memories wrapped up in what I sold/scrapped/gave away. It’s been good that my cars, (which I at least managed to get my money invested, back on), are going to people who will look after and use them. It’s up to them now to make new memories with them.

I’m nearly there with the clear out, but as you know Land Rovers when disassembled seem to take up more space than you think by a magnitude of 4-1, so that’s my next task to sort that out.😂
Good news, hot off the press, is that I have secured a smaller space to work in, so I’m happy with that. Time to get the final clear up done, the Landy spares sorted out, then the big move can happen.

So a new phase begins, but at least I can keep going with my hobby! 👍
 
Back
Top