Try again….

This site contains affiliate links for which LandyZone may be compensated if you make a purchase.
Well the last engine bay weld is done as far as I can see. So far on the welding front:

• new headlight boxes and headlight mounts
• new inner wings
• new a pillar panel fabricated
• new front wing body mounts
• bulkhead scuttle removed, cleaned, repaired
and welded back into place
• n/s a pillar repair and post
• o/s a pillar repair
• o/s replacement foot panel and new
reinforcement plate
• n/s foot panel replacement and
reinforcement plate

Still need to do drivers footwell, o/s sill and outer wheel arch. Probably a New Cross member and I’ll check the inner rear quarters whilst there.

Next up will be a good tidy up of the bay then spray the lot in epoxy primer and seam seal. Then paint, then dynax!!
 
Going to have a final sand down tonight and a couple beers when the sweat box has cooled off a touch! You will always just itch to get paint on but kick yourself for rushing afterwards.
Hopefully, should work allow, I’ll get a flyer in the afternoon and mix up some epoxy.

FUN FACT - epoxy primer might not be labelled as 2k but I wouldn’t go near traditional without an air fed!

Paint being used is quartz high zinc non iso epoxy primer.

Top coat is nisocoat 2. Also an iso free product. Compromise - perhaps but stay away from 2k at home!!

IMG_4874.jpeg
 
Couldn’t work out why this primer felt like the gun was loosing its lungs half way through the tank despite 40psi present at the gun steadily. Then realised there was a vacuum being caused!! Took the little bung off the top and it worked lovely. That’s 2 coats epoxy done. Will get some pics once fumes have gone,
 
You not painting the engine bay same colour as the wing you did?
No mate. I was going to, but, I saw a Japanese RRC restoration where all the inner was painted in satin and it looked the bollocks. Plus the satin is another layer of rust prevention. Do you think I’m making an error in doing so?
 
Depends on what your wanting the satin will look good when fresh but remember after time it will catch dust etc and be harder to keep clean where as a gloss same as exterior will look more oem and easier to keep clean
 
It’s your build and if satins in your head go for it , either option is a million times better than how it was
 
Cheers mate, looks a bit dusty in the picture but it’s actually pretty smart. I’ve filled every seam and joint with puraflex and that came before looks for me!! Also going to make a few cavity wax holes.
Now comes the fun part, racking my brain, going through phone pictures, the box of Land Rover bolts and screws and rave diagrams. I have tidied up everything and boxed parts up but I know they’ll be bits I can’t find lol. Yesterdays first loss was a bonnet catch plate. Ordered a new one and know I’ll find the original 😂.
I also found an unopened yrm box with an inner wing support in - no idea how I had 3!
Feel like I’ve hit a decent milestone now. It’s still very overwhelming when I view it as a whole but you just have to look at it in sections one bit at a time!
 
I’m already having fun with wiring and routing of the loom. I’ve got a good 30 pictures but not enough!
Has anyone got any good pictures showing the main routing?
 
Few bits that I just can’t find despite boxing and bagging everything!!
One being this, which I am begrudged to spend a tenner on 😳
IMG_4923.jpeg

The wiper motor metal bush on one side was also shot. Would mean buying a new one so just modified a spare shock bush that was in the box.
IMG_4918.jpeg
IMG_4920.jpeg
IMG_4921.jpeg
 
What parts do you need photos of
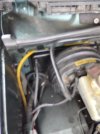
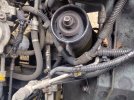
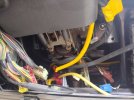
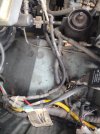
I think I’ve worked it out, but ideally the loom where it exits drivers side and goes behind the engine. I think, the fork in the loom goes about where the loom grommet is as one bit. I’ve pulled through all of them now. If you do have any I’d appreciate it.
I might have bought another d1 so I’ll have that one for reference soon which will be ideal…
I made a bit of an error as forgot about the battery tray 😂🤦‍♂️. I think I’ll bolt one instead of weld - one so that I don’t have to put heat back through the panel and paint and two i can detach it and clean underneath easily as that’s obviously a rust catchment area!
 
I think I’ve worked it out, but ideally the loom where it exits drivers side and goes behind the engine. I think, the fork in the loom goes about where the loom grommet is as one bit. I’ve pulled through all of them now. If you do have any I’d appreciate it.
I might have bought another d1 so I’ll have that one for reference soon which will be ideal…
I made a bit of an error as forgot about the battery tray 😂🤦‍♂️. I think I’ll bolt one instead of weld - one so that I don’t have to put heat back through the panel and paint and two i can detach IMG_20240725_153637481.jpgit and clean underneath easily as that’s obviously a rust catchment area!
 

Attachments

  • IMG_20240725_153104609_HDR.jpg
    IMG_20240725_153104609_HDR.jpg
    356.1 KB · Views: 59
  • IMG_20240725_153439609.jpg
    IMG_20240725_153439609.jpg
    249.5 KB · Views: 61
  • IMG_20240725_153038194.jpg
    IMG_20240725_153038194.jpg
    382.3 KB · Views: 60
  • IMG_20240725_153030649.jpg
    IMG_20240725_153030649.jpg
    226.2 KB · Views: 63
Back
Top