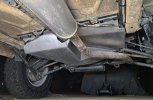
Freelander 1 Alloy sump guard/ undertray

This site contains affiliate links for which LandyZone may be compensated if you make a purchase.
Thanks,
Just yesterday I've actually found a scrappy that just does LR parts near Lisbon here!

They say they have some complete (plastic and metal bits) belly pans for €95 each, that's just 80 of your Earth Pounds!

So, to avoid fannying around I will just get one of them as I would have had to buy the metal frame bits before then some sort of plate anyway as mine has nothing on it.

When thinking about making my own I was thinking about 5 series ally as its far stiffer than 1 series, but also much more expensive
I even thought of laminating up some sort of GRP replacement as well

But buying a scrappy one is much easier :)
 
Bugger, it seems that scrappy is actually in Holland with some Portuguese guy here sellng stuff, so the postage is going to be expensive
Bugger again

back to plan A
 
Bugger, it seems that scrappy is actually in Holland with some Portuguese guy here sellng stuff, so the postage is going to be expensive
Bugger again

back to plan A
I am by no means a metal fabricator but by using the frame of the rubbish plastic supplied undertray it wasn’t hard. I used riv bolts and a couple of pieces of angle iron and it works great, just have to undo the bolts to take off the tray leaving the frame in place for oil changes etc.
 
Hi!
Did you ever do this?
Also, what Alloy of Aluminium did you use initially, standard 1050 bog standard from B&Q type stuff?
Cheers
I still have the same alloy plate - it is just about surviving despite some further abuse.

If re-making in the future, I would absolutely use something thicker and stronger. I can't recall the material specification of the alloy used: I bought off an on-line metal supplier. But as others have said, I would keep the existing alloy frame and rivet the alloy plate into it. :)
 
Slightly off topic but related, saw this professional effort at a rear guard on a facebook group. Sadly the person who fitted it didn't answer questions about where they got it from or how they fabricated it.
 

Attachments

  • diff guard.jpg
    diff guard.jpg
    342.4 KB · Views: 30
Slightly off topic but related, saw this professional effort at a rear guard on a facebook group. Sadly the person who fitted it didn't answer questions about where they got it from or how they fabricated it.
Looks well made… (the guard)
 
Last edited:
Slightly off topic but related, saw this professional effort at a rear guard on a facebook group. Sadly the person who fitted it didn't answer questions about where they got it from or how they fabricated it.
By the angle of the trailing arm that has been lifted beyond acceptable.

Especially by the fact the tyre looks to be rubbing the sill as its been dragged forward so much by the arm.
 
By the angle of the trailing arm that has been lifted beyond acceptable.

Especially by the fact the tyre looks to be rubbing the sill as its been dragged forward so much by the arm.
Agreed, when I lifted one a few years ago I lengthened the arms by something like 15mm to put the rear wheel back in the middle of the wheel arch but I suspect these tyres are oversized too.
 
Back
Top