BDC
Active Member
Well I’ll have to shorten the valve stem also to avoid issues I suppose.That may depend on the limits of the camshaft followers
BDC
Active Member
The head gasket had 3 holes in it, I think that’s the largest available gasket. I could coat it in VHT copper cement spray for head gaskets in an effort to fill in the gaps.BMW say the head cannot be skimmed and as it's prone to cracking, personally I wouldn't go for a skim. I recon the head would pull down OK but it's a gamble as is skimming but it's the cheaper option.
Datatek
Well-Known Member
Never tried anything like that. I have only really done alloy heads on 4 cylinder cars, I have found that they will pull down with some distortion. I do a trial with engineers blue, I coat the surface and fit with no gasket and torque down. Leave over night and remove. You can then see any places where the head and block do not meet.The head gasket had 3 holes in it, I think that’s the largest available gasket. I could coat it in VHT copper cement spray for head gaskets in an effort to fill in the gaps.
BDC
Active Member
Ok seems a good idea, I’ll try this first with the old bolts. I’m using new bolts with the new gasket.Never tried anything like that. I have only really done alloy heads on 4 cylinder cars, I have found that they will pull down with some distortion. I do a trial with engineers blue, I coat the surface and fit with no gasket and torque down. Leave over night and remove. You can then see any places where the head and block do not meet.
Datatek
Well-Known Member
Yep, the old bolts are fine for the test.Ok seems a good idea, I’ll try this first with the old bolts. I’m using new bolts with the new gasket.
Grrrrrr
Technician, Bodgit & Scarper Ltd
BMW say the head cannot be skimmed and as it's prone to cracking, personally I wouldn't go for a skim. I recon the head would pull down OK but it's a gamble as is skimming but it's the cheaper option.
+1.
Even if it leaks you've only lost a bit of time, a head gasket and a set of stretch bolts. It sounds like it is pretty close to tolerance. The head gaskets have some dimples on for the thickness; I guess you could just go for the 3 (thickest) and hope it pulls up any difference.
BDC
Active Member
Hi Guys,
I'm in the process of assembling the engine. I was cleaning the hydraulic valve tappets and found that some of them do not move, like half of them are stuck. Can they be dismantled or is it better to replace them all together?
Secondly, Once the lower chain is ligned up between the crank and the fip is does not matter were the copper links are for the alignment of the camshaft right? As long as piston 1 is at TDC.
Grrrrrr
Technician, Bodgit & Scarper Ltd
Hi Guys,
I'm in the process of assembling the engine. I was cleaning the hydraulic valve tappets and found that some of them do not move, like half of them are stuck. Can they be dismantled or is it better to replace them all together?
Secondly, Once the lower chain is ligned up between the crank and the fip is does not matter were the copper links are for the alignment of the camshaft right? As long as piston 1 is at TDC.
View attachment 303088View attachment 303089View attachment 303090View attachment 303091
As far as the links are concerned I would do it exactly as per RAVE.
I don't recall any issues getting my tappets out once the camshaft was removed. I guess a squirt of something like WD40 wouldn't hurt and maybe use a magnet.
BDC
Active Member
The tappets are out actually but they don’t seem to work properly. The inside part that touches the valve stem is spring loaded. Some of them do not move when I try to push on them, even with the oil out.As far as the links are concerned I would do it exactly as per RAVE.
I don't recall any issues getting my tappets out once the camshaft was removed. I guess a squirt of something like WD40 wouldn't hurt and maybe use a magnet.
Datatek
Well-Known Member
You could try soaking them in a bath of Acetone which may free them off. Don't use WD40 which is a water dispersant it leaves a deposit that may not be helpful.The tappets are out actually but they don’t seem to work properly. The inside part that touches the valve stem is spring loaded. Some of them do not move when I try to push on them, even with the oil out.
Grrrrrr
Technician, Bodgit & Scarper Ltd
The tappets are out actually but they don’t seem to work properly. The inside part that touches the valve stem is spring loaded. Some of them do not move when I try to push on them, even with the oil out.
The valve stems have springs held in place by washers and collets. They require a valve spring compressor, a big one, to loosen them off, grab the 2 halves with a magnet and release the springs. Or are we talking about something else?
BDC
Active Member
I mean the buckets that sit over the valve assembly. On the inside of those buckets or tappets there is a spring loaded part. When in use they are filled with oil. When they get stuck the valve clearance is no longer correct.The valve stems have springs held in place by washers and collets. They require a valve spring compressor, a big one, to loosen them off, grab the 2 halves with a magnet and release the springs. Or are we talking about something else?
BDC
Active Member
Small update. Omdat engine is out, managed to take it out and leaving the torque converter in place. Engine mounts are shot. Waiting for them to arrive and good weather to get newly built engine in. Alas still need to remove bearing at the back in crank because new more was originally a manual gearbox. I hope with a bit of luck I get the new lump in before the end of the year


Grrrrrr
Technician, Bodgit & Scarper Ltd
Small update. Omdat engine is out, managed to take it out and leaving the torque converter in place. Engine mounts are shot. Waiting for them to arrive and good weather to get newly built engine in. Alas still need to remove bearing at the back in crank because new more was originally a manual gearbox. I hope with a bit of luck I get the new lump in before the end of the year
View attachment 305320View attachment 305321View attachment 305322
The manual box is friskier but the clutch fork arrangement is a bodgit so I would leave it as an automatic.
It's a hell of a lot easier lining up the gearbox when it is on the ground in front of you. iirc when we did MrGorsky's we sat the gearbox up and the torque converter drops 3 times and then there's a measurement to check. I've got a feeling I made something up to hold the torque converter in place while we mated it up to the engine. We did it a few times to double-check the measurement. Then the whole lot drops back in without too much hassle. Easier on the diesel as there's more space and less weight.
RangeRoller dt
Well-Sprung Member
They are generally pretty reliable as they rotate slightly every time they are used. Can see why a stuck one would cause upset, we all know what M51 tickover sounds like on cold startI mean the buckets that sit over the valve assembly. On the inside of those buckets or tappets there is a spring loaded part. When in use they are filled with oil. When they get stuck the valve clearance is no longer correct.
BDC
Active Member
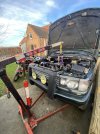
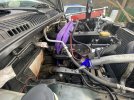
Yet another update,installed the new engine yesterday. It lined up quite good to the gearbox, I thought it was going to be a tedious work but eventually it went in rather fast.
It already runs but I still need to tighten the head bolts another 90 degrees as per rave.
Of course I brother radiator plastic vent hose so I installed another hose a more flexible one.
After inspection I couldn’t find any oil leaks whatsoever
If all goes well I can button up today and start with the next project phase. I need to install a new condenser unit, dryer and compressor, stil need to source a compressor.
A well dirt I need to look how to take off the bumper.
Attachments
BDC
Active Member
I did remove the coolant radiator, oil cooler and intercooler just not the condenser.You did that the hard way! If you remove the slam panel and radiators you get a load more space at the front and don't have to lift the engine so much.
BDC
Active Member
Hi Guys,
So far so good, the new engine is running fine no odd noises or anything so very pleased with it.
However I find it is very smelly and smoky (white grey). I think it is running a bit rich.
Temperature is stable at idle or driving so no overheating.
Idle is set at 750 rpm
Injection setting in nanocom is at 128
Modulation can be better it’s 78%
I’ve been reading up a bit about the fip.
There is the rotational movement and than there’s the top section of the fip which can be moved forward or backwards slightly.
But I’m a bit confused, in which instance should what be done? rotation is to adjust timing modulation I think and the other to change the quantity of fuel injected right?
Fuel Current quantity is @7,5 - 7,75 at idle.
I’ve read it should be between 5-6mg/.. is that correct?
So far so good, the new engine is running fine no odd noises or anything so very pleased with it.
However
Temperature is stable at idle or driving so no overheating.
Idle is set at 750 rpm
Injection setting in nanocom is at 128
Modulation can be better it’s 78%
I’ve been reading up a bit about the fip.
There is the rotational movement and than there’s the top section of the fip which can be moved forward or backwards slightly.
But I’m a bit confused, in which instance should what be done? rotation is to adjust timing modulation I think and the other to change the quantity of fuel injected right?
Fuel Current quantity is @7,5 - 7,75 at idle.
I’ve read it should be between 5-6mg/.. is that correct?
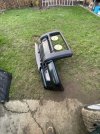
I also didn’t get the bolts out for the bumper bulbar. I finally managed with a bit of persuasion. So new condenser and dryer are in.You did that the hard way! If you remove the slam panel and radiators you get a load more space at the front and don't have to lift the engine so much.


