What have you done to your Freelander today

This site contains affiliate links for which LandyZone may be compensated if you make a purchase.
Finally sorted the soft clutch after replacing the gearbox, new bracket and Slave Cylinder was needed so installed those, and while I was there, fixed a horrible squeal that we had on start, tightening the alternator, what a lovely start now 😂
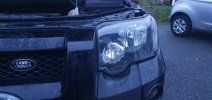
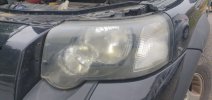
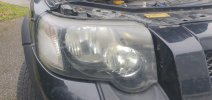
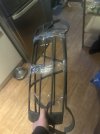
Please forgive the state of the engine bay!!! I Haven't yet cleaned it after green-laning
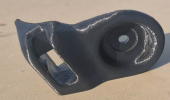
It was obviously some really easy angles:
1739627897886.png
1739627914364.png


1739627948824.png
1739628043168.png
 
The link doesn't work for me as I don't use MS but maybe will be OK for others. It's for me OK cause I don't need them but was just asking in case it would be helpful for other 3 door owners.
Sorry about that, anyway here's the pic of one of the sides as promised, if 3d printing just remember to use mirror mode for the other side.
 

Attachments

  • 3d printed part.PNG
    3d printed part.PNG
    151.1 KB · Views: 19
Yep, it's the two screws holding the guards on to the wing that are the issue. All four of them! I guess they have rivnuts or somethig on them. The headlights will be staying on the car but the guards really do need to come off for me to polish them properly. Hopefully I can get some pliers or mole grips on the inside to hold them. If not it'll be drilling off the heads and replacing them with new bolts. Any tips?
guards.jpg
 
Yep, it's the two screws holding the guards on to the wing that are the issue. All four of them! I guess they have rivnuts or somethig on them. The headlights will be staying on the car but the guards really do need to come off for me to polish them properly. Hopefully I can get some pliers or mole grips on the inside to hold them. If not it'll be drilling off the heads and replacing them with new bolts. Any tips?
View attachment 335359
Not sure if it will help but the wings come off pretty easily. Unbolt at the top then a couple of screws in the door shut and one or two in the wheel arch.
You would be lucky to drill the bolts without melting a lot of plastic.
 
So I started the job before seeing the advice above but I managed to drill off the heads without melting the plastic. I drilled a little bit at a time, taking advantage of the brisk wind to cool the bolts. I then managed to manipulate the rivnuts out of the wings carefully as there is just enough give in the plastic. Anyway, the polishing is not perfect as the lenses have some fairly deep marks due to the guards rubbing over time, but they look great and the difference in performance is staggering. Guards will be refitted on friday when I've had chance to get some stainless allen bolts, nuts and washers.
 

Attachments

  • 20250219_174125.jpg
    20250219_174125.jpg
    123.6 KB · Views: 8
  • 20250219_173958.jpg
    20250219_173958.jpg
    239.6 KB · Views: 10
  • 20250219_174008.jpg
    20250219_174008.jpg
    266.3 KB · Views: 9
  • 20250219_153906.jpg
    20250219_153906.jpg
    198.4 KB · Views: 9
  • 20250219_153851.jpg
    20250219_153851.jpg
    230 KB · Views: 10
So I started the job before seeing the advice above but I managed to drill off the heads without melting the plastic. I drilled a little bit at a time, taking advantage of the brisk wind to cool the bolts. I then managed to manipulate the rivnuts out of the wings carefully as there is just enough give in the plastic. Anyway, the polishing is not perfect as the lenses have some fairly deep marks due to the guards rubbing over time, but they look great and the difference in performance is staggering. Guards will be refitted on friday when I've had chance to get some stainless allen bolts, nuts and washers.
If you’ve not done already, give them a clear-coat to finish and protect.

Look good!
 
If you’ve not done already, give them a clear-coat to finish and protect.

Look good!
The Turtle Wax stuff I have got claims to also seal the headlamps to protect them but I'm sceptical so I will get some clear coat in due course. Now that I've got the siezed light guard fixings off and will be replacing them it'll be easy to whip the guards off and do a second polish before coating with protector. The main aim was to get the lights sweet for the retest on Friday morning though, although I'm very happy with the results.
 
Surprised the guards rub.
See if you can tweak the fittings to give clearance when you refit.
Mine have space behind but that is a pre facelift.
 
Back
Top