Steve's unexpected Series 3 rebuild.

This site contains affiliate links for which LandyZone may be compensated if you make a purchase.

LincolnSteve

Well-Known Member
Posts
1,204
Location
Lincoln
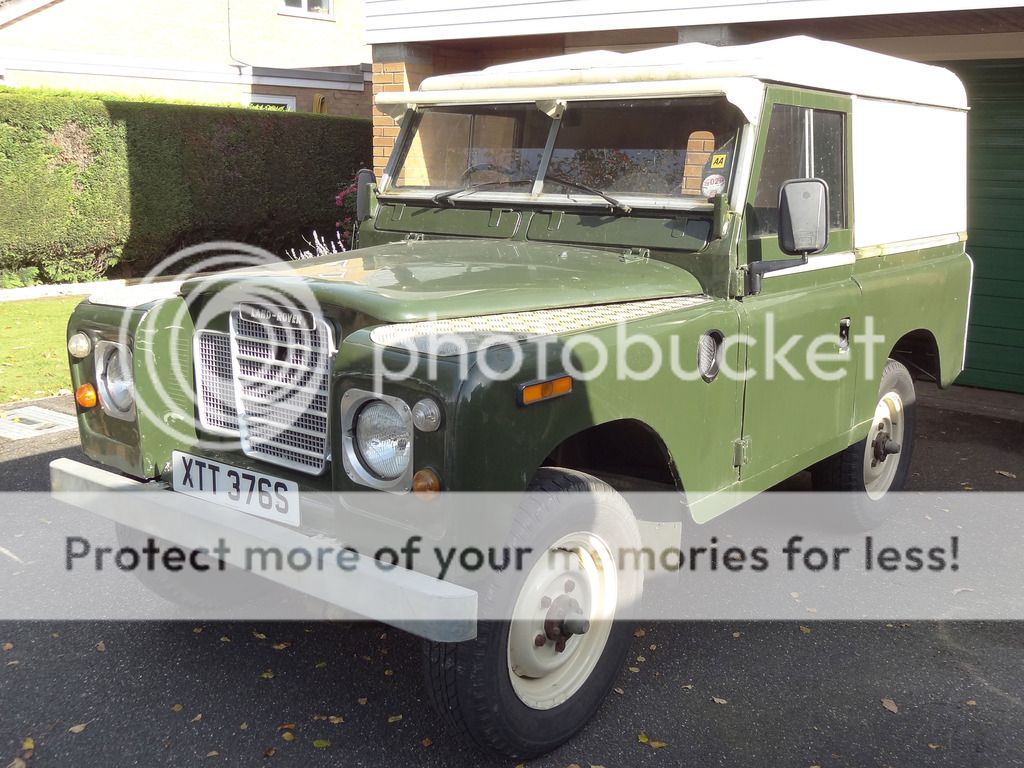
So in October 2014 I finally got myself a petrol 88inch series 3. I have no real reason to own one but I have wanted one since I was a boy. Of course because it's my first Land Rover it has turned out to be in much worse condition than I thought. If I had any sense I should have bitten the bullett and replaced the chassis. But because i'm daft I decided that I want to get it through at least a couple more MOT's with it's original chassis and bulkhead first.

DSC06763_zpstavqgzxh.jpg
[/URL][/IMG]
It looks pretty good if you don't get too close. At least James liked it.
[/IMG] [/URL]

[URL='http://s1042.photobucket.com/user/lincolnsteve1/media/Mobile%20Uploads/DSC06767_zpstottrgxh.jpg.html']

[/URL]
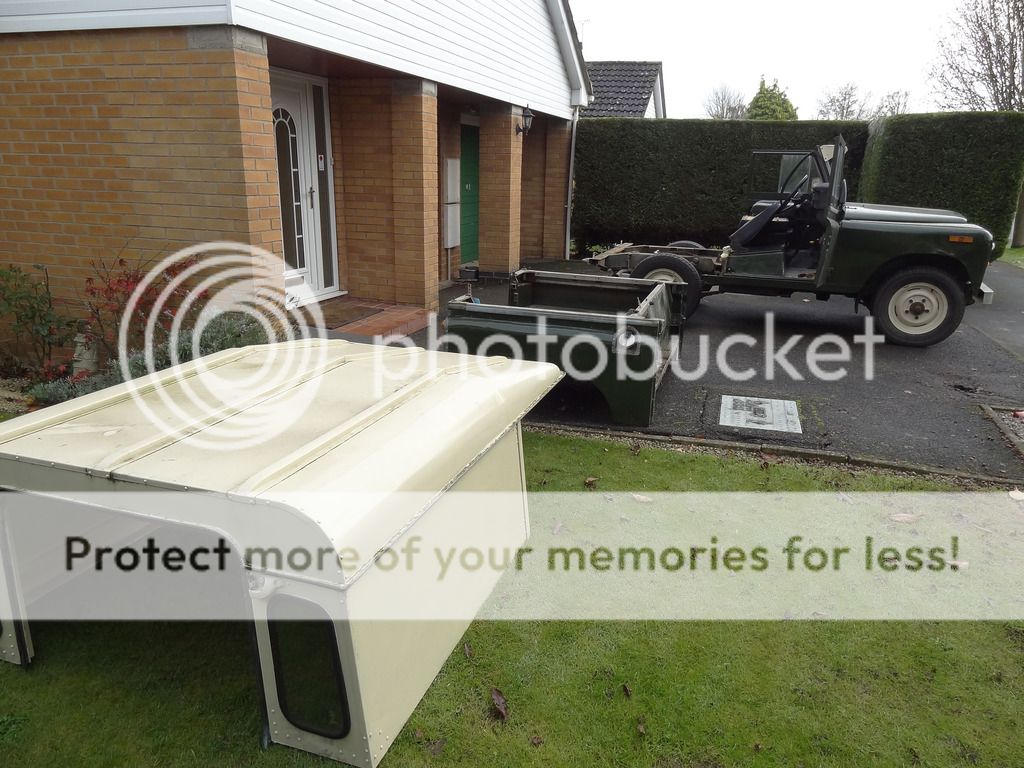
Any way the more I poked about the more it became obvious that some major work was going to be needed so the strip down began.
[URL='http://s1042.photobucket.com/user/lincolnsteve1/media/Mobile%20Uploads/DSC06931_zpswy8h3xgr.jpg.html'][/URL]
 
Last edited:
Good work fella!
I too bought my Landy after always wanting one for no particular reason, it helped that my son is mad about them too :)
My thread is in this section under new toy!
The things we do for our kids eh. I will have a look at your thread now.
 

So clearly I needed a new out rigger. I know you can buy them easily enough but I needed the practice and I already had the steel so I decided to make one.


I made templates and cut out the bits.

I don't have a way to bend steel that thick so I scored it half through with a thin cutting disc on the grinder, bent it and welded up the corner. The extra holes are for plug welds to try and make it even stronger. You may notice i'm a little bit OCD.


When it started coming together this is how it looked.

 
Last edited:
So when it was finished this is how it turned out in comparison with the original one. The bracket on top is not fixed on yet. I fastened a piece of wood across the other tub mounts to show me where it needed to finally be welded.


I hadn't realised just how bad things were underneath the outrigger. It soon became clear when I chopped it off that a bit more work was going to be needed.


I removed a big section of the side to get nice strong steel back in there but to my delight I found that it had started to rot through at the bottom as well! You can see the small looking hole on the bottom of the chassis.


There started to be a few gloomy sessions when this began happening. I sorted one area only to find new holes/damage/bodges within no distance of where i'd just finished. Only thing to do is keep calm and carry on.
When the new bit is in and prettied up a bit it doesn't seem so bad.


Then the magic red oxide covers everything. Happy again.


Even then you can see a small unpainted area on top. Yeah it's another hole.
 
Last edited:
Can you edit the posts to update the links too please? I've just started reading this thread and I'd like to have a look.
 
Can you edit the posts to update the links too please? I've just started reading this thread and I'd like to have a look.
Will do. I've put the first 3 photos back so now I know what i'm doing i'll sort the rest out as soon as I can. This stuff actually happened months ago so I will also try to get up to date.
 
So I just kept on working my way through the chassis fixing each new problem that I came across. I'm starting to be a bit of a local celebrity in the village. I'm out on the drive so often that all the dog walkers are now stopping for a chat and to check on progress. As I said earlier I probably should have scrapped the chassis. The phrase 'uneconomical to repair' haunts me. The thing is that i'm really hooked now. I've got it's history from the DVLA and it turns out that the dealership that first sold it are still in business at the same address and is still run by the same family. It was then sold to a local farm and worked there for about 5 years. I found a livestock syringe behind the dash when I removed it so I thought it had been a farmer. Next it was put to work in Exmoor national park. After that it moved to London for many years. I've looked at the adresses on Google street and some of them look quite posh. Then it's off up to Yorkshire where it gets neglected and ends up with me as owner number 10. What a life! It's got to keep going.

I'll show you a few more chassis photos then we'll move on to something else before you get bored.
The crossmember was covered in muck so I didn't appreciate how bad it was. I soon realised though.


More cutting and welding. I haven't done much overhead welding and I can honestly say that in the confined space i've got it's bloody awful. I really try to keep the welds as neat as I can (making sure they're strong is first priority of course) but I couldn't get on with it.


I had to plate over a weak spot inside the crossmember. I welded all around the edge and plugged those holes to make sure it really got a grip. As the sparks rained down on me, sizzling through my overalls I decided that before I tackled the rest of the underside I was going to flip the whole chassis over. I was so fed up I was having to invent new swear words because nothing I could think of was nasty enough to describe how I was feeling.

It started coming together. I was going to try to rebuild the seam across the bottom but in the end I couldn't be arsed.


There was loads more chassis work to do, in fact i'm still doing it, but the photos might all start looking the same. So when I next get some time to post photos i'll show you the hoist i've built into the garage for lifting the big stuff and flipping the chassis over. Cheers. Steve.
 
very pro ...i tried it years ago on a ford cortina and if i say so my self i made a right mess of it..so i appreciate the skill needed..may i ask are a fabricator by trade as its not just the superb welding but the clear metal work lines youve achieved
 
very pro ...i tried it years ago on a ford cortina and if i say so my self i made a right mess of it..so i appreciate the skill needed..may i ask are a fabricator by trade as its not just the superb welding but the clear metal work lines youve achieved
Thanks for the kind comments. I'm definately not a trained fabricator, my day job is working for the NHS. I'm just a fanatical amateur with OCD. I did do a couple of restoration courses at Lincoln college so twelve, three hour sessions. The tutor was fantastic and I picked up some good tips.
 
So eventually we end up at this stage.

So now i've got to make some room to tackle all the previous owner bodges on the front half of the chassis. This means engine and gearbox out and the bulkhead off.
I was really nervous about taking the bulkhead off. It needs a lot of repairs so I knew I would have to do something with it but I kept reading about people leaving them on to avoid allignment problems. The problem was a hole in the chassis right under the drivers side of the bulkhead and I just wasn't going to be able to fix it properly with it in the way. So if you're going to be a bear, be a grizzly! Decision made. Take it all off.
Some years ago I bought a home made engine hoist from an old guy who was a friend of my father in law. This chap had been an engineer on u-boats in the war. He was taken prisoner and stayed in England after the war rather than going back to Germany. Manfred used this hoist to take the engine out of his Humber for a refurb before any long road trips. It was obviously well made, he was a very skilled man. It sat unused for years but now I set about modifying it to fit in my garage. Here it is.


So it can lift a small ramp without collapsing, that's a good start. Let's get on to something a little more hefty.

Very nervous times when the engine was dangling like that but we all lived happily ever after.

My assistant seems indifferent to my genius. Very dissapointing.
 
Back
Top