I did exactly this last year. When I bought my 88" station wagon it looked like this;
and now it looks like this:
Mine was not a genuine County though, someone had added the decals later and I am not entirely convinced that it even started life as a station wagon, I think it was originally a hardtop.
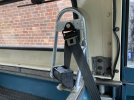
The conversion was actually very easy and needed only spanners, a drill and a rivet gun. The back door has been replaced with a drop-down tail gate and the front seatbelts have been attached directly to the rear bulkhead which does make them slightly awkward if you are tall but as I am only 5'6" it is not a problem for me. The hood and sticks cost around £900 from Exmoor trim and I was able to sell the rear door and sides for about £100, still stuck with the bloody roof though

. I had to buy the antiluce catches and some new hinges for the tailgate but fitting took less than 45 mins. The rear door was really easy to remove and the roof and sides were simple but time consuming due to rusted bolts, removing the roof and sides took about two hours.
Fitting the soft top was very simple and the kit came with full instructions and all the fittings needed. I was lucky that my Landy was already fitted with the six rope hooks on the rear tub and the two horseshoe hoops at the back. if you need to buy these they are not expensive and the instructions with the hood frame show you where to rivet them on. I just needed to rivet on the front hooks by the front door and the rear staples for the hood straps but these were included in the frame kit. The top rail was easy to fit it, just bolts and rivets on but fitting it properly so it doesn't leak requires drilling the top of the windscreen frame and riveting the rail on. Some people skip the riveting to be able to easily remove the rail and not leave any holes in the windscreen frame but this can lead to the rail pulling away from the frame causing leaks and a baggy hood. I have not had any leaks at all from mine as it is riveted. Fitting the hood frame took about 3 hours which was slightly longer than expected as I spent an hour removing brown sticky residue from the hood frame as Exmoor Trim had taped all the pieces together with brown parcel tape which was a pain in the arse to get off.
Fitting the canvas was very easy. If you have ever put up a canvas frame tent you will have no problems at all. After fitting the hood it is a good idea to give it a good soaking several times before rolling the back and sides up for any period of time as the canvas shrinks slightly as it dries the first few times and if it isn't securely fastened as it dries it can shrink too much and not fit properly.
One other thing to note is that the hood frame does not come with any weather seals so I would suggest buying a length of rubber door seal before fitting the frame. You can try and reuse the seals from the original roof and sides but they don't fit very well as I have found, however leaking door seals are fairly standard on series Land Rovers and mine have a 3mm gap all around the top half of the door.
After fitting the rear tailgate I had to move the spare wheel to the bonnet. I was lucky in that my bonnet was the type designed to carry the wheel and all I needed was the bolts and hooks to secure it. Some bonnets are not designed to carry the wheel though and the spare has to be attached to the rear bulkhead inside which may mean buying and fitting the bracket to secure the wheel.

