Series 3 Replacing steering relay lower seal in-situ

This site contains affiliate links for which LandyZone may be compensated if you make a purchase.

Georgeblade

Active Member
Posts
139
Hello,
I've had a good trawl thru the threads on steering relays but to no avail.

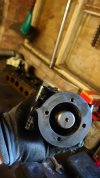
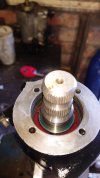
I am having a problem getting the bottom 'collar' off of the relay that I think holds and seal and the bottom of the relay body from the elements.

The 4 bolts that bolt up into the chassis came out easily, the the bit that they secure (the retainer) won't budge.

Another problem this causes is getting to the 4 bolts closest to the relay pin that hold the seal (that I want to replace) in-place because the raised lip of the retainer prevents getting on the bolts with a spanner or socket.

Can I get a bit muscular and prize off the retainer (part number 90624433).?

Many thanks for any help on this one.
 
Last edited:
STOP! Just as well you can not get at the inner bolts. There is a very strong spring in the See steering arm post.
Thanks for reply, I have read elsewhere on this forum that its unlikely the thing will spring apart, however I am happy to be guided by others experience.
Maybe I'll zip it back together and fill it with swivel grease for now.
 
Quite safe to remove lower seal retainer and even the top one too. The shaft is held in place by the 'wedge effect' of the upper and lower split bushes. It will only fly apart if you drive the shaft out of the relay body.
 
Quite safe to remove lower seal retainer and even the top one too. The shaft is held in place by the 'wedge effect' of the upper and lower split bushes. It will only fly apart if you drive the shaft out of the relay body.
That is my understanding too.
 
Agree with post above no risk of spring coming out if you just remove oil seal retainer plate especially of top arm and retainer plate are still fiitted.
You would be lucky to get away with just changing the seal unless shaft is in good condition where the seal runs.
You could fit a speedi sleeve to lower portion of shaft , it needs tapping on but as long as top steering arm and retainer are in place would not be a proiblem.
Pic of sleeve attached
The chassis retainer ring should just lever off with its 4 bolts out.
 

Attachments

  • Steering relay shaft speedi sleeve.png
    Steering relay shaft speedi sleeve.png
    152.7 KB · Views: 186
Agree with post above no risk of spring coming out if you just remove oil seal retainer plate especially of top arm and retainer plate are still fiitted.
You would be lucky to get away with just changing the seal unless shaft is in good condition where the seal runs.
You could fit a speedi sleeve to lower portion of shaft , it needs tapping on but as long as top steering arm and retainer are in place would not be a proiblem.
Pic of sleeve attached
The chassis retainer ring should just lever off with its 4 bolts out.

Thanks Blackburn, I'm having trouble with the retainer, as in getting it off - but I shall persevere.
 
Sounds like its rusted onto the relay and if that is the case I would be very surprised if the relay shaft isn't very rusted as well. When I started my rebuild I cleaned my relay up and put new seals on it. A while later I had a proper look and the shaft was really bad where both seals run so I eneded up rebuilding the orignal with genuine parts. That place in Cyprus must have wondered why they had a run on relay parts as there were several of us doing this at the same time. You can take the top and bottom plate off and it wont explode in you face as the taper keeps it all together. Swivel grease is probably not a bad idea if you do a rebuild but in all honesty you will never get it in a scabby old one. The oil runs down the groove machined into the tuffnel tapered bushes, ok if you have clean new ones but it it is an old scabby one then that groove will probably be blocked up. Then if it does get past it will run out the bottom because the seal isn't. Now reassembly of the realy is REALLY exciting!
 
I have a few pics from when I did mine. No special tools needed but you may need to make a spring compressor unless you have the hands of the Hulk. I will just search for the pics
 
Found them....
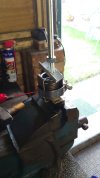
First you will need to completely compress the spring as in the pic. The metal plates on the side are to hold the spring compressed if you zoom in you will see the lip is shapped to allow the relay shaft to pass theough. I think it was a tclamp I used to hold it all together when the spring compressor was removed. I undid it a bit just to make sure it all held together. This is optional but you may from this point want to put you may wantto put your health and safety squint on!
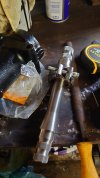
Clamp one of the tapered bushes on you will need to leave a bit of the top of each bush exposed. This is so that you can tap it into the relay housing once it is in the housing by a little bit the taper will stop the bush coming off.
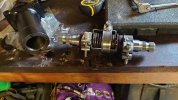
Third pic shows it all built up and the exposed portions of the bush. Dont forget to assemble the shaft correctly with the washers and thrust washers. Lube everything to make it easier to put together
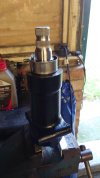
fourth pic shows it almost together, just got to remove the clamp and use a soft faced mallet to drive it home.
Fifth pic its in and just need to put the end plates on and oil in it.

Im not an expert don't maime youself.
 

Attachments

  • Spring compressed.JPG
    Spring compressed.JPG
    155.7 KB · Views: 138
  • clamp on the tapered bush.JPG
    clamp on the tapered bush.JPG
    218.7 KB · Views: 142
  • the hand genade.JPG
    the hand genade.JPG
    286.7 KB · Views: 130
  • almost in.JPG
    almost in.JPG
    175 KB · Views: 124
  • its in.JPG
    its in.JPG
    177.1 KB · Views: 148
  • oil in it.JPG
    oil in it.JPG
    183.2 KB · Views: 143
Back
Top