Repairing my 1998 V8

This site contains affiliate links for which LandyZone may be compensated if you make a purchase.
Doogendburgh, thanks for the encouragement.
The chassis looks good full length, only some small patches near the round rear X member suspension mounts.
And yes I have seen worse again thanks for the the
encouragement.
I see you are in Pittsburgh, my daughter is studying at Pitt.
Terry, I have had a few V8's over the years, all on LPG which makes it
affordable.
Yes they are addictive.
Have you looked at the dreaded spider for the Immobiliser fault? what are the symptoms - non start?
I am picking up a complete front bumper complete with mid section and driving lamps
 
I am ordering the repair panels for the V8 from YRM next few days
Full rear floor repair kit.
full rear crossmember kit and mounting bolts.
I think there will be some prep work and fettling/welding small sections before I rip the cross member out.
Take some datum measurements, take off the rear door and weld in a bracing piece.
 
I had a drive over to YRM in Co Durham today and bought all the repair panels for the floor, x members, side rails, new rear cross member and rear mounting bolt kit.
While I was out called over to Middlesbrough bought a complete front bumper with all the extra's, washers, pipework and driving lamps £30 - bargain!!
Very impressed with YRM's, friendly and the panels look top notch quality.

10-196x196.png 11-196x196.png This is what I have to repair the rear floor and X member, Pics taken from YRM website.

Ian
 
Last edited:
Brilliant mate. Be sure to give it a decent coat of paint before it all goes in and the bottoms obviously hard to get to when it is in!! Good luck
 
I will give it a good undercoat and get some wax oil if its still available.
Ordered the repair panels for the end of the sills.
I have already got the repair panels for the inner wheel arch, the seat belt mount panel and the outer one under the side panel.
Just bought to new rear outer arch panels off FB marketplace - half price - bargain!
First job when I get home tomorrow will be prepping the rusty alpine light window rust - small patch so should not take long, too windy yesterday
Ian
 
No wax oil mate! Wait until it’s less damp. Decent primer and top coat then spray bilt hamber wax or dinitrol on it. Under seal isn’t the one unless you got good coatings beneath it and even then I wouldn’t. The fender I’m doing is covered in it. Guess what’s underneath the horrible stinking bitumen coating once I’ve got it off. R**T
 
Great work will be watching this as you go along for advice.
Did you get the Body lifted off Mate ? would like to see how its done as plan to do mine sometime, when I finally finish my 110 Rebuild.
 
@resto_d1, Thanks for the advice, I have been fairly dormant with the beast as weather been either bloody cold or windy.
@border, too expensive to lift the body off with crane, should be doable with 4 strong blokes.
I have decided I would like to use the beast for a bit so..... I am going to delay lifting the body, fettle/weld/fix the work needed and use the beast for a bit - seems reasonable.
My plans to lift the body is to fabricate a lifting frame to lift the body wide enough to wheel the chassis out.
This will be some time away.
I have bought some new rear wheel arch panels £65 delivered!, rear of sill panels and I have found some rear wheel arch repair panels from a failed resto, so.... I have all I need for the panel repairs.
I have bought some great flame retardant welding overalls from the bay of fleas, brand new Arco pro flame resistant for £29 fluorescent orange - bargain! and some brand new white KLM flame retardant overalls for £12 delivered - bargain, these are very white indeed!!!
pics to follow haha.
 
Flame retardant won’t stop welding tattoos mate! Leather is pretty much the only thing that will but you don’t have to worry too much about that unless welding on your back. You need to take at least one hot rock down the sleeve to really be a d1 man haha. Atleast the overalls will stop you have a draw full of sh1t battered clothes which are only good for working on the car! Have to throw out whatever gets box oil on it too as that’s just foul lol
 
I have had a few burns over the years and yes welding upside down!
They are very nice overalls though haha and if the beast catches fire I will at least not burn to death!! - hope not!!
I have started making the first repair panel and of course had to pick a complicated ish one - the crusty bit on the alpine window, template is made just need to transfer to metal, swage is going to be fun :)
 
I do see what you are saying, the truck is bog stock except for LPG
The only special feature this one has it was registered in late June 1999 so must make one of the last D1’s registered unless anyone knows better?
Mines 2000, just like yours, red, v8, manual, converted to lpg with 4 tanks and a smaller one for petrol. Belonged to a welder so ought to be bettern yourn, but I haven't really stripped it down. Sorned at the moment and awaiting my attention. but had a years MOT when bought and went like stink!
Will be watching this very attentively!
:D
 
I made a pigs ear of one side and a nice repair on the other. Funny that the pigs ear side doesn’t weep but nice one does! Your right the weather has been awful for it :( seems a long time ago since I’d be working on it in the eves with a beer
 
Flame retardant won’t stop welding tattoos mate! Leather is pretty much the only thing that will but you don’t have to worry too much about that unless welding on your back. You need to take at least one hot rock down the sleeve to really be a d1 man haha. Atleast the overalls will stop you have a draw full of sh1t battered clothes which are only good for working on the car! Have to throw out whatever gets box oil on it too as that’s just foul lol
As far as my wife in concerned, I have two sorts of clothes, decent clothes and working clothes, and the latter get dirt, oil of all types, burnt, caught in grinder, weldburns, you name it but bless her they all go in the washing machine and come out nice and wearable and comfortable.
Welding on your back is sh1t, even when overalls or whatever are buttoned up to the wrist, neck, tucked into boots, under proper welding gauntlets, etc. The ones i hate are the ones that go down the back of your neck or in your boot. Can't get them out fast enough!
 
Hello everyone following,
I hope everyone is safe; all be it locked in your garage/drive/house.
I have been busy with paying work and the weather was pretty dire last 2 months, mainly windy which is no good when MIG welding, I did not get any further with the Alpine window repair, I have found the templates I made so going to try and replicate in metal in next few days.

The Lockdown hopefully will not slow me down unless I run out of gas - I could of course make an excuse that my sick old relative is needing food nearby to Dixons of Westerhope ;-)
I made a start again yesterday so.....
What I have been doing yesterday?
I was practicing removing the spot welds from an old front end I kept for the slam panel.
Bejeezus what a long laborious job.

Lessons learned?
Wire brush the edge of the panel to see where the spot welds are and rub your finger over spot welds as you can feel em and they fill with muck! :)
Centre punch tapping the weld is not good enough as the spot weld remover jumps out and wears out the remover guide.
I ended up centre punch tapping the welds, used a small drill and pilot drilled the weld then used the remover. much better and quicker consistent results removing the spot welds.

Buy some decent tools!
I have bought 2 decent spot weld chisels - long one with cutting edge at the base and a side tapping one.
A short 90 degree panel pry bar tapered at the ends.
These made the job a lot easier.
I may invest in a pair of spot weld pliers - these have a copper pad that you place where spot weld will go so you don't weld thru, bit pricey at £25 - £30 but may save time in long run.

Do not force panels apart and if they are not separating there will be a spot weld somewhere.
I was shocked how rusting the battery panel, headlight panel, behind the upper front wing support and the lower slam panel was - I could visibly see the inner wings were shot, there was rust to fill a large sized pan!
There was lots of rust between where the the panels joined in certain places.
This spot weld removing will be a lot easier on the body itself.

Jobs today? As the weather is great - I am going to rub down/wire brush the exposed front inner wings and treat with rust convertor and prime.

Onward :)
Ian
 
Last edited:
Well been a while and sorry for no updates.
I have been fixing up my 1989 GPZ900R and this lockdown is a pain in the a.se!
Done nothing to the V8 for a few months now.
A few days ago I decided to move the V8 closer to my garage door so I can start the welding.
I thought just strap the fuel tank temporarily, lash some fuel pipe on, charge the battery and see if the old girl fires up.
If and when this happens I need to make up a near side rear copper brake pipe then hopefully the V8 will be mobile again
A very clean fuel tank - inside and out, and a new pump fitted.
OH fitting the pump, I was trying to fit the pump with the seal on the pump - my hands were sore trying to get the plastic lock ring on!
sideways thought and remembering a post on here - put the seal on the tank fit the pump - took all of 20 seconds haha
2020 006.JPG 2020 006.JPG

Onward
More news tomorrow
 

Attachments

  • 2020 008.JPG
    2020 008.JPG
    341.7 KB · Views: 158
Last edited:
Well I had a great result today.
After a false start and I reattached the earths on the rear posts.
The Beast fired up first turn of the key.
There was a leaky return pipe so I extended the hose from the tank cut out the rotten pipe.
Moved the beast for the first time in a year - think its been that long?
Its all jerry rigged up just to get it moved but I was very impressed how easily it moved, no stuck brakes.
The up side of the leaky return pipe was I found quite a bit flaky rust on top side of the chassis just before the rise to the back of the chassis, good news is forward of that the chassis feels OK.
Need to renew a brake pipe but that will not take long.

Onward
Ian
 
Blimey its been a while since I have updated - May this year, and what a year!!
So I have been very lazy and done nowt until last week and have decided to do little bits every day.
As the V8 has been standing out in the rain a bit of rust has appeared where I took the rear panels off.
The rust has been cleaned off, treated with convertor where needed.
I have discovered the near side is worse than first anticipated - no matter I will tackle the rust and patch it bit by bit then install the repair panels I have bought.
I will be rebuilding/replacing the rear floor, rear cross member and a very small patch on the chassis in the usual place near the shock mountings.
I am not going to cut too much out at a time so I can keep the replacement of good metal under control and I think will make the rear structure stronger for the removing of the rear X member.
Take care everyone
Pics of progress so far tomorrow.

Onward
Ian
 
Sold my 1995 V8 and sold my 1995 300 TDI.
Bought a 1999 registered D1 manual V8.
I did some repairs to get it thru mot, new downpipes with cats, lambda sensors, anti roll bar refurb, new brake pipes, simple refurb of the front calipers, cleaned up discs, new coolant header tank, replacement ECU, repaired an exhaust manifold.
So all the lights worked, windscreen washers ok and the front end was in reasonable condition.
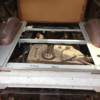
Well........ I did a quick once over before taking the beast for mot and found a rotten body mount under rear cross member, rear floor was ropey - very ropey! and fuel pipes on the edge!! I would need to patch the usual rot area on rear door arch area.
SO I have decided to repair restore the rear of the beast and 'get it right' for the mot
HOW and HOW did this vehicle get an mot over the last 2-3 years!!!
More soon - and pics hopefully
Ian

Awesome mate, loving the YouTube videos and keep up the good work in saving this disco 1!
 
Back
Top