My First rebuild - 110 station wagon

This site contains affiliate links for which LandyZone may be compensated if you make a purchase.
Finally had a chance to pick my stuff up from the galvaniser today. I'm now a very happy bunny indeed! But I still have a lot of paintwork to get on with so am considering buying a shed to do it all in instead of filling the garage with overspray.

image.jpg
 
Cheers Al, I'm looking forward to getting the rest of the capping on and finally get the tub fixed in place, need to paint those side frames red but all the capping is staying bare galv, just not getting any time to work on it at the minute, which is daft really because I've sat on my arse most of the summer with no work on. I'd love to have the roof on it so I could start the dash and wiring but getting that painted is going to be a challenge - think I'm going to take it to my mates garage and paint it there.
 
Sounds like a plan. Get a little bit of heat on in the garage this time of year. The galvanised stuff paints ok, mind. Layers of primer gently rubbed down in between layers. You can get a smooth finish.
 
Well, it's been 6 weeks since the last post, a busy 6 weeks at that, but I've still squeezed in a few jobs on the 110. Here is the lovely galv capping back in place. I need to redo the very first rivet on the O/S to get rid of the step, but other than that it's gone well.
image.jpg
image.jpg
 
Full respect to you for taking on such a big project in those conditions, I'm also doing a rebuild outside at present. Not easy but I'm loving every moment of it even through all the part cleaning, rot,mess,and feeling like I'm getting nowhere. Keep up the great work that you are doing its inspiring me to get off my arse and get out in the snow to move forward with mine.
 
Full respect to you for taking on such a big project in those conditions, I'm also doing a rebuild outside at present. Not easy but I'm loving every moment of it even through all the part cleaning, rot,mess,and feeling like I'm getting nowhere. Keep up the great work that you are doing its inspiring me to get off my arse and get out in the snow to move forward with mine.

Respect to you, and the OP, for persevering in those conditions! :cool:
 
Respect to you, and the OP, for persevering in those conditions! :cool:
Thanks turboman, at times I can't be bothered going out to a freezing small shed to get stuck in to the rotting parts but reading other peoples rebuilds helps to forget how tedious it is. I would like to point out from a novice and first landy that getting comments from all those that have done it before is really encouraging.
 
Thanks turboman, at times I can't be bothered going out to a freezing small shed to get stuck in to the rotting parts but reading other peoples rebuilds helps to forget how tedious it is. I would like to point out from a novice and first landy that getting comments from all those that have done it before is really encouraging.

What I've found is that even if I can get a small amount done it has a good positive psychological effect. It's a step in the right direction, even if it's a small step. You don't want to sicken yourself! If you are doing a full rebuild outside it's going to take a while, so it's important. This forum is great for picking you up and giving you inspiration. :)
 
Thanks everyone for all the positive comments, it really is a boost! Not sure if I put a photo of the roof up before but it was pretty manky, with bird crap stains that had eaten through the paint over the years, a few dents which I've left in for the sake of a bit of character. I couldn't leave this though. This was after I hammered it out from the inside, and shaved off the protruding part.
image.jpg

And one skim if fibreglass followed by two skims of filler with some primer on top,
image.jpg

Fully primed. I Actually did this repair last weekend and primed it Monday afternoon, then wet-flatted it Thursday/Friday afternoons. Didn't feel the cold at all once I got going.
image.jpg

And just been outside with some captain tolleys and applied to every joint. Tomorrow I think I'll put some seam sealer in the joints and Monday afternoon will hopefully get some colour on it.
 

Attachments

  • image.jpg
    image.jpg
    221.4 KB · Views: 176
After reading thread after thread about leaks, I thought I would iron out any problems I could see as I went and I saw these joints on the screen frame. Not ideal so I scuffed the metal with some 60 grit paper and filled with a small amount of fibreglass. Filled over and sanded smooth and I think it's an improvement. A sealed surface for the seal to seal against. Did this on all four corners of the frame. And yes - I am aware of how hard it is to fit a screen and I may have made it even harder but we will see. On the insides I have put the smallest amount in, just enough to make it smooth.
image.jpg
image.jpg
image.jpg
image.jpg
 
When I stripped the 110 I spotted these rubbers, not the fact they exist, but the way they sit. You glue them to the panel and cross your fingers. Mine had come adrift long ago and twisted sideways, and the green paint from a distant respray had entered the gap and showed where they had/hadn't sat correctly. That and the water inside. Here is one placed on the panel, roughly how it sat before I stripped it.
image.jpg
image.jpg

My aim is to try and eradicate as many of these little problems now, and I thought this was a good idea. I bought some angle aluminium off ebay (3/4 x 3/4 x 1/16 @ 800mm x4) and fitted it like so, thinking that now the rubber seal has nowhere to move to. Only down. My fingers are still crossed, but not as tight:)

image.jpg
image.jpg
 
Well, the snow on Sunday put me off sealing the roof, so did it yesterday. here it is with seam sealer applied to the joints, on top of a couple of treatments of captain tolley's.
image.jpg
image.jpg
image.jpg

Another day off today, I had a few errands to run like take the kids to school, visit thd Doctor, and sort out my Scenic heater fan. Now I love my Scenic, call me what you like but it's been a fantastic car over the 5 years and 60k I've owned it, and I've been all over the UK, plus holidays to France and Spain in it, but they were not designed with maintenance in mind. Anyway, that finished, about 11 I made a start on this.

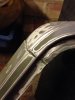
Got a good few coats on here, over the course of about 2 hours. 800ml worth to be precise! Got a run on the N/S above the front door but not bad I don't think. Even now as I look out the window it's not blooming so a change of thinners was a good idea. I think I'll just fit as is, and wont bother buffing the entire roof, with a view to doing a spot repair on the area with the run at a later date. Note the dent - one of many!
image.jpg
image.jpg
image.jpg

And thanks to my 'one panel ahead' rule being applied to this side frame when I primed the roof, I even found time to slap a few coats of red on this aswell.

image.jpg

And now I'll pick the kids up, wait for the Mrs to finish work and think I'll go for a bike ride. And give the neighbours a weeks rest from painting!
 
Looking good mate, galv cappings look great, hope mine turn out as good as that as leaving them bare if my plan too.
Paint looks bloody good too, not exactly ideal weather but what can you do ay..
 
Cheers Aaron, I'm really shocked with the paint, I keep getting up and admiring it. When I bought it, the guy in the shop said his system for mixing cellulose didn't recognise the paint code I gave him, but his system for mixing ordinary basecoat or 2k did. So he mixed it according to that yet used a cellulose base???? Or something. Plus I used a different thinner, but I used that on the red sideframe and that bloomed so it must be the paint. I will ask in greater detail exactly how he made the paint when I next go in. Everyone says things like you can't use celly unless its 1 million degrees outside with zero humidity and no wind etc etc. I just slapped it on, the ground was still frozen and the gun I used was about £25. Ive never seen anything like it and I can't even say it's beginners luck cus I've been painting stuff the best part of 15 years! Those galv cappings are my favourite though, to think I considered painting the whole thing silver or metallic red!!! Makes me shudder now just thinking about it.
 
And one more thing, if anybody is having anything galved - drill all the holes you need in it before you send it away. I forgot a few but luckily they aren't at low (salt and road dirt) level.
 
A slow couple of days since the roof painting (still looking very shiny!) and I finally have my heater box in place. Took it apart to remove all the disintegrated foam.

image.jpg
image.jpg
image.jpg


Flushed the almost new matrix and refitted with some new foam, cutting a few bits to go round the pipes.
image.jpg
image.jpg
image.jpg

The standard box-to-bulkhead seal was also ruined, so used this 10mm foam instead, stuck with good old EVO-STIK contact adhesive. Also fitted an extra piece of steel across the bottom for additional support for the foam. I did paint this after BTW.
image.jpg

This is the backing bracket for the wiper motor. It was fouling on the steel of the seal support.
image.jpg

Not any more. And the bracket is soaking in a bit of rust remover to get ready for a lick of paint.
image.jpg

The whole box has been sealed and painted, it's loosely in place, but I may just make one more modification - wire the blend flap permanently closed so all air has to go through the matrix and I never have to mess with the cable for it. Hot air or no air! If I want cold air I can open the 'gun flaps' after all. Suggestions welcome.
 
Always kept mine in the permanent hot air position. Told the Mrs never to move that control. It stayed like that for years and years. Never missed the cold air setting :)
The painting on the roof looks spot on. :)
 
Back
Top