Hi there,
I’ve been lurking for some time as I’ve been looking at disco 1-2 but not really got a chance to get hands on with anything. Been fixing my own cars for 20 years, mostly French stuff, some Japanese and latterly some German.
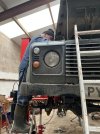
So anyway, next door neighbour was fixing a local farmers 2014 defender 90, and I offered to lend a hand to find out how it bolted together so I knew what I might need letting myself in for should I finally take the plunge on something BL .
It had brake failure and needed quite a bit underneath.
New shocks
New bushes for the hockey sticks
New discs pads calipers shoes all round, brake hoses, wheel bearings and a load more poly bushes
All for under a grand!
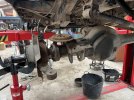
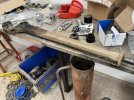
Couple of photos to go along with the morning, took us about 1:30 mins to strip the right front hockey, change the bushes, swap the strut.
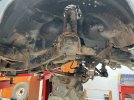
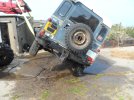
It’s a farm car and is thoroughly abused but seemed solid despite that, however you can see why the chassis rot from where the corrosion is coming through.
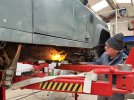
Luckily my neighbour is an ex engineer and has an oxy acetylene torch that did a good job of heating things up to undo. And made light work cutting the bottom of the strut out. Speeding things up no end.
the transmission jack came in super handy.
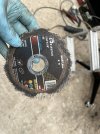
A reminder to wear ppe as the grinder disc disintegrated cutting the strut top nut
Cheers
J
I’ve been lurking for some time as I’ve been looking at disco 1-2 but not really got a chance to get hands on with anything. Been fixing my own cars for 20 years, mostly French stuff, some Japanese and latterly some German.
So anyway, next door neighbour was fixing a local farmers 2014 defender 90, and I offered to lend a hand to find out how it bolted together so I knew what I might need letting myself in for should I finally take the plunge on something BL .
It had brake failure and needed quite a bit underneath.
New shocks
New bushes for the hockey sticks
New discs pads calipers shoes all round, brake hoses, wheel bearings and a load more poly bushes
All for under a grand!
Couple of photos to go along with the morning, took us about 1:30 mins to strip the right front hockey, change the bushes, swap the strut.
It’s a farm car and is thoroughly abused but seemed solid despite that, however you can see why the chassis rot from where the corrosion is coming through.
Luckily my neighbour is an ex engineer and has an oxy acetylene torch that did a good job of heating things up to undo. And made light work cutting the bottom of the strut out. Speeding things up no end.
the transmission jack came in super handy.
A reminder to wear ppe as the grinder disc disintegrated cutting the strut top nut
Cheers
J