tobyd
Member
- Posts
- 88
- Location
- Brighouse West Yorks
Hi,
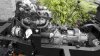
Whilst out today my LR stopped and wouldn't idle at all just dying. It would stay running if revved so I believe the idle jet may be blocked. It did clear when I got the 1/2 mile home but wondered how I could try to clear anything still lingering in the jet.
Is there an easy way to do it? Can I blow air through somewhere with compressed air?
Can I spray it with something?
Cheers Toby