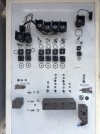
I'm just about to re-build my EAS valve block.
A couple of queries however that came to mind as I was removing it form the car and wouldn't mind getting a second opinion on.
First, I'm rebuilding it as my tank slowly looses pressure (circa 2 psi per hour) and it;s not from the tank or the line going to the tank as I tested them in isolation.
First thing I noticed is the pressure relief valve threads have a load of silicone on it.
It's not a bit I can access when on the car, so I guess this could have been the source of my problem.
I wasn't going to remove it, but now I need to find a way to test it's sealed.
All I have to hand is a 6mm shader valve and some 6mm pipe.
How can I test the thread here whilst being the least amount of kit?
And why would threads leak such that someone needs to use silicone? Stripped perhaps? If so, am I better looking for another block first? Anybody selling one cheap?

Side note, this block has been beautifully machined. Great work Land Rover. Probably a bit over the top, but I like it.
Back to problems.
The hole to the left is where the pressure senor was. It has some hard white crud around the hole and on the threads. What is this? Do I need a special sealant here?
I know others have just used some loctite to seal. Is this adequate?
Finally, I'm umming and ahhring what to do with the pipes.
They were sealing fine prior to removal, but they don't look in great condition. I was careful removing, using a plastic chopstick to press the collet.
I would trim back, but they get worse before they get better.
Would some silicon grease or similar help just to give the pipes the best chance of sealing?

A couple of queries however that came to mind as I was removing it form the car and wouldn't mind getting a second opinion on.
First, I'm rebuilding it as my tank slowly looses pressure (circa 2 psi per hour) and it;s not from the tank or the line going to the tank as I tested them in isolation.
First thing I noticed is the pressure relief valve threads have a load of silicone on it.
It's not a bit I can access when on the car, so I guess this could have been the source of my problem.
I wasn't going to remove it, but now I need to find a way to test it's sealed.
All I have to hand is a 6mm shader valve and some 6mm pipe.
How can I test the thread here whilst being the least amount of kit?
And why would threads leak such that someone needs to use silicone? Stripped perhaps? If so, am I better looking for another block first? Anybody selling one cheap?
Side note, this block has been beautifully machined. Great work Land Rover. Probably a bit over the top, but I like it.
Back to problems.
The hole to the left is where the pressure senor was. It has some hard white crud around the hole and on the threads. What is this? Do I need a special sealant here?
I know others have just used some loctite to seal. Is this adequate?
Finally, I'm umming and ahhring what to do with the pipes.
They were sealing fine prior to removal, but they don't look in great condition. I was careful removing, using a plastic chopstick to press the collet.
I would trim back, but they get worse before they get better.
Would some silicon grease or similar help just to give the pipes the best chance of sealing?

