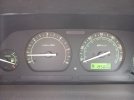
Finally got around to those whirring VCU Bearings.... Oh Boy I hope I never have to do that again...
1739222570509.png

The Middle to rear shaft popped off without issue... The Front to Mid? What a story.

I started off by just me and a friend pulling. No Luck, so we decided to heat up the splines area to hope they'd be easier to separate.

1739222775206.png


Would that work? no of course not. So after almost 2 hours of heat, hammering, WD40, more hammering, more heat more hammering and it hadn't moved I went to the next best option. Mechanical Advantage :cool: Now it's quite hard to see what is going on but I think you can work it out...
1739222912231.png

News Flash that did not work and I am glad the rear window was down already... How did I finally remove it?


This video is the most useful video I have ever seen on the VCU bearing replacement Worked a charm, 15 minutes later and a now wonky prybar, it was separated.

Hoped you liked my short story πŸ˜‚
 
Finally got around to those whirring VCU Bearings.... Oh Boy I hope I never have to do that again...
View attachment 334894
The Middle to rear shaft popped off without issue... The Front to Mid? What a story.

I started off by just me and a friend pulling. No Luck, so we decided to heat up the splines area to hope they'd be easier to separate.

View attachment 334895

Would that work? no of course not. So after almost 2 hours of heat, hammering, WD40, more hammering, more heat more hammering and it hadn't moved I went to the next best option. Mechanical Advantage :cool: Now it's quite hard to see what is going on but I think you can work it out...
View attachment 334896
News Flash that did not work and I am glad the rear window was down already... How did I finally remove it?


This video is the most useful video I have ever seen on the VCU bearing replacement Worked a charm, 15 minutes later and a now wonky prybar, it was separated.

Hoped you liked my short story πŸ˜‚

Top marks for perseverance
 
Finally got around to those whirring VCU Bearings.... Oh Boy I hope I never have to do that again...
View attachment 334894
The Middle to rear shaft popped off without issue... The Front to Mid? What a story.

I started off by just me and a friend pulling. No Luck, so we decided to heat up the splines area to hope they'd be easier to separate.

View attachment 334895

Would that work? no of course not. So after almost 2 hours of heat, hammering, WD40, more hammering, more heat more hammering and it hadn't moved I went to the next best option. Mechanical Advantage :cool: Now it's quite hard to see what is going on but I think you can work it out...
View attachment 334896
News Flash that did not work and I am glad the rear window was down already... How did I finally remove it?


This video is the most useful video I have ever seen on the VCU bearing replacement Worked a charm, 15 minutes later and a now wonky prybar, it was separated.

Hoped you liked my short story πŸ˜‚

When I first got my old F1, I took it to the guys in the video to have a new VCU fitted, along with new bearings. It's a long trip to their base in Suffolk from Kent, but worth it. They did the job while I waited in their office (with lots of coffee!)

Sue and Nobert are a top team for F1 and F2 repairs, and have lots of spares in stock on the shelf. Would thoroughly recommend them.
 
Finally got around to those whirring VCU Bearings.... Oh Boy I hope I never have to do that again...
View attachment 334894
The Middle to rear shaft popped off without issue... The Front to Mid? What a story.

I started off by just me and a friend pulling. No Luck, so we decided to heat up the splines area to hope they'd be easier to separate.

View attachment 334895

Would that work? no of course not. So after almost 2 hours of heat, hammering, WD40, more hammering, more heat more hammering and it hadn't moved I went to the next best option. Mechanical Advantage :cool: Now it's quite hard to see what is going on but I think you can work it out...
View attachment 334896
News Flash that did not work and I am glad the rear window was down already... How did I finally remove it?


This video is the most useful video I have ever seen on the VCU bearing replacement Worked a charm, 15 minutes later and a now wonky prybar, it was separated.

Hoped you liked my short story πŸ˜‚

Well done for getting them apart.

I think that must be the most linked to video by a long way in the Freelander section of LZ.

Separating the props really is a case of absolute maximum aggression with a chisel and heavy hammer - and hope the chisel doesn't fly off and get you in the gonads!
 
Handbrakes do vary from FL1 to FL1.

My experience is that if you pull handbrake to centre shoes, then slacken the cable right off loose, then flick the adjusters until the shoes are just rubbing the drum but not tight, then adjust cable for 4 clicks and check again it frees OK after releasing.

That's as good as you'll get. Obvs make sure all moving parts and levers are free to move. Copperplate on shoe bearing faces and joints.

One of mine skids to a halt, the other gently slows and holds. Same adjustment !!

Look at the adjuster to check both cables are about the same stretch or it will pull on one side.
 
I don't think so but I wasn't there to see them do it as I had to go to a site meeting. They didn't need to do the rear though. There is still an everso slight pull to the left but I think that's possibly road camber. Difficult to say though for sure.
When I drove it, it didn't feel too far out. I'm not surprised the rear didn't need adjustment, as it came off another vehicle, and production tolerances are pretty close between subframes.

There is no camber compensation in the suspension geometry, so road camber can cause a slight pull to the left. This is easily proven by going on the outside lane of a duel carriageway, at which point the pull should be to the right. If it doesn't begin to pull right, then further investigation will be needed.
 
Finally got around to those whirring VCU Bearings.... Oh Boy I hope I never have to do that again...
View attachment 334894
The Middle to rear shaft popped off without issue... The Front to Mid? What a story.

I started off by just me and a friend pulling. No Luck, so we decided to heat up the splines area to hope they'd be easier to separate.

View attachment 334895

Would that work? no of course not. So after almost 2 hours of heat, hammering, WD40, more hammering, more heat more hammering and it hadn't moved I went to the next best option. Mechanical Advantage :cool: Now it's quite hard to see what is going on but I think you can work it out...
View attachment 334896
News Flash that did not work and I am glad the rear window was down already... How did I finally remove it?


This video is the most useful video I have ever seen on the VCU bearing replacement Worked a charm, 15 minutes later and a now wonky prybar, it was separated.

Hoped you liked my short story πŸ˜‚

Last time I worked on a prop shaft I had to use a sledge hammer on the chisel as the gentle tapping shown in the video had zero effect. I needed a new bolt too but the most important thing is the shape of the chisel.
 
Last time I worked on a prop shaft I had to use a sledge hammer on the chisel as the gentle tapping shown in the video had zero effect. I needed a new bolt too but the most important thing is the shape of the chisel.
100% The shape of the chisel I ended up having to use a pry bar make the gap between the UJ and bolt tint slam the thing in that smack it as hard as possible into the bolt to slightly move it, bit by bit, honestly might just buy another propshaft next time!
 
I used the 3D printer at work to print the fixings for my 3 door parcel shelf, it worked a treat. Also fitted wind deflectors, I must say it looks goodπŸ‘
It didn't happen if we don't see the photos. ;)
Links to the stl files would be nice too. :)
 
Today I investigated the propshaft vibration I was experiencing at 55+ mph. I whipped off the front half and found that the front CV joint was pretty rattly. Eureka I thought, that'll be it. Went for a quick spin with the rear half still on and the vibration was still present but slightly less. As a result, took the back half off and found the rear UJ had some play in it. Went for a drive again without either end fitted and no vibration. A friend of mine had given me a prop he had lying around from his old FL1 he'd scrapped years ago, but it had been lying around for a while outside and looked a bit like it had been dragged out of the sea so I was sceptical, but all the joints seemed pretty good. I fitted the front half and then had to do the school run so didn't have time to get the rear on but all seemed good. Fitted the rear half and we're all good. No vibration and all running nice and quiet! It seems the rearmost UJ was the most sigificant cause but I think the front CV was playing a part.
 
Last edited:

Similar threads