I went outside at lunchtime seeing as it was sunny and had another pre-MOT look at the Land Rover. I jacked it up and attempted to wobble the wheels to check for movement in the wheel bearings and steering swivels, took the wheels off and had a look at the brakes - looked OK, still plenty of meat on the pads, and no sign of pipes deteriorating. I had a bit more wobble of all the bits of the suspension I could reach and couldn't feel any slack. Even the shock absorber bushes seemed to be holding the pins reasonably firmly. I will replace the rear shock absorbers though. Not because of their motion, but because they feel like they're about to fall to pieces. The moisture has got under the paint and the metal is coming apart in big rusty flakes. I've ordered Boge ones this time. Seemed like a sensible mid-range price point, between the Britpart own brand £49 a pair bargain basement ones and the more expensive Koni ones I fitted ten years ago. I've had my money's worth out of them, but for what I'm doing with the Land Rover it's not worth going for very high end items.
 
Tools used today;
- Dremel
- Grinder
- Drill
- Nut splitter
- Pry bar
- Right foot for stomping the fuel tank out
- 10 brain cells I had left

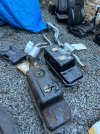
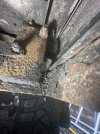
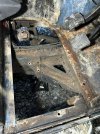
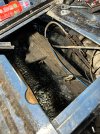
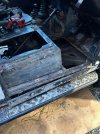
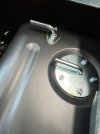
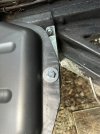
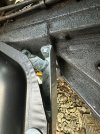
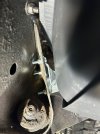
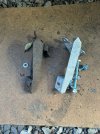
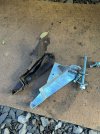
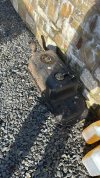
Finally got the fuel tank out.. tip for anyone in the future.. remove the floor as I worked out.
 

Attachments

  • WhatsApp Image 2023-10-31 at 16.11.57.jpeg
    WhatsApp Image 2023-10-31 at 16.11.57.jpeg
    882 KB · Views: 105
  • WhatsApp Image 2023-10-31 at 16.11.59.jpeg
    WhatsApp Image 2023-10-31 at 16.11.59.jpeg
    615.3 KB · Views: 94
  • WhatsApp Image 2023-10-31 at 16.11.58 (1).jpeg
    WhatsApp Image 2023-10-31 at 16.11.58 (1).jpeg
    663.2 KB · Views: 92
  • WhatsApp Image 2023-10-31 at 16.11.58.jpeg
    WhatsApp Image 2023-10-31 at 16.11.58.jpeg
    476.4 KB · Views: 94
  • WhatsApp Image 2023-10-31 at 16.11.57 (1).jpeg
    WhatsApp Image 2023-10-31 at 16.11.57 (1).jpeg
    649.2 KB · Views: 94
Fixed the left side high beam (ie the lack of it). I'm docking myself 1 LandRoverOwner® Point as I didn't investigate and diagnose the issue properly, but am awarding myself back the 1 LandRoverOwner® Point for eventually fixing it without too much hassle. Turns out the bulb wasn't making a good connection in the socket, so once I cleaned the connections and added a bit of copper grease to the pins it worked beautifully!

Pity I didn't figure it out before I spent a whole £5 on wire to attempt a different fix, but hey ho! Fingers crossed it'll be ok in the MOT today...
 
Ah the dizzying highs and lows of Defender ownership. Dropped it off this morning, was chatting to the mechanic about it's 'quirks' (MOD Defenders are in KM for mileage, and they also have a special knob that stops the lights working) and it turns out he's a massive fan of the ol' Defenders, and worked for the REME and so is very familiar with exMOD Defenders!

And for the lows, turns out my gorgeous svelte Defender is 50kg overweight for their ramps :(.
No MOT or Service for her today, booked into another place for Friday next week.
 
Then we have the old fuel tank in with the new + bracket + some new cork washer to go in with the pickup lines
 

Attachments

  • WhatsApp Image 2023-11-03 at 15.07.26.jpeg
    WhatsApp Image 2023-11-03 at 15.07.26.jpeg
    311.7 KB · Views: 84
  • WhatsApp Image 2023-11-03 at 15.07.27.jpeg
    WhatsApp Image 2023-11-03 at 15.07.27.jpeg
    353 KB · Views: 97
  • WhatsApp Image 2023-11-03 at 15.07.27 (1).jpeg
    WhatsApp Image 2023-11-03 at 15.07.27 (1).jpeg
    557.6 KB · Views: 89
  • WhatsApp Image 2023-11-03 at 15.07.29.jpeg
    WhatsApp Image 2023-11-03 at 15.07.29.jpeg
    364.4 KB · Views: 87
  • WhatsApp Image 2023-11-03 at 15.07.30.jpeg
    WhatsApp Image 2023-11-03 at 15.07.30.jpeg
    908.9 KB · Views: 83
  • WhatsApp Image 2023-11-03 at 15.07.29 (2).jpeg
    WhatsApp Image 2023-11-03 at 15.07.29 (2).jpeg
    828.1 KB · Views: 91
  • WhatsApp Image 2023-11-03 at 15.07.29 (1).jpeg
    WhatsApp Image 2023-11-03 at 15.07.29 (1).jpeg
    783.4 KB · Views: 93
Then we have the old fuel tank in with the new + bracket + some new cork washer to go in with the pickup lines

Did you also spray the fuel tank with truck bed liner? It's worth doing this as the paint supplied on the tank is dire. I gave mine a thorough two coats prior to fitting.
 
Did you also spray the fuel tank with truck bed liner? It's worth doing this as the paint supplied on the tank is dire. I gave mine a thorough two coats prior to fitting.
Nah this came in a matte black finish, other ones i've fitted in the past have been line a shiny black.. I've read that you should run some sealant around the protection layer at the top to stop sh*t getting in there and rusting away..

I'm going to look at getting a plate to protect it when i'm off road also..

Really horrible job to fit that (even though it's only 3 bolts!).. was hitting my side steps.. sil bolts were seized.. then the galv chassis i had to take about 1mm off the radius arm area to make it fit!
 
Completed wiring in my rear view camera/dashcam (screen in the mirror) to a permanent and a switched +ve feed so now it goes on and off properly with the ignition.
Also got new hose clips for the bottom hose to hopefully stop the pesky leak!!
 
Completed wiring in my rear view camera/dashcam (screen in the mirror) to a permanent and a switched +ve feed so now it goes on and off properly with the ignition.
Also got new hose clips for the bottom hose to hopefully stop the pesky leak!!
Happy with how it works, or haven't you had a good chance to test it.
 
Happy with how it works, or haven't you had a good chance to test it.
Very happy with it, i got it from Amazon, 50 quid ish and then extra for the hardwire kit. you can switch between front and rear view and it has a trigger from the reverse light for guide lines but i've not sorted that yet. if you add an SD card you get dashcam function and it records front and rear at the same time. very impressed with the quality.
mounted the camera just next to the rear screen washer. the front camera is built into the screen housing..

so much better rearward vision and makes it easier to park

Amazon product
 

Attachments

  • IMG_20231101_220135.jpg
    IMG_20231101_220135.jpg
    184.5 KB · Views: 80
  • IMG_20231028_094638.jpg
    IMG_20231028_094638.jpg
    211.6 KB · Views: 79
  • IMG_20231028_094630.jpg
    IMG_20231028_094630.jpg
    283.8 KB · Views: 77
  • IMG_20231024_134455.jpg
    IMG_20231024_134455.jpg
    158.3 KB · Views: 89
Nothing too exciting today, but did start the work on the removable bed in the back.

IMG_4016.jpeg

¾" plywood stretching across the gap, just resting on the metal at the moment. I will add some form of padding, thinking neoprene or rubber under the ends of the ply to stop them rattling/ even out the rough surface of the wheel boxes. Riveted on the angle aluminium to the front to protect it from bangs and scrapes. First time riveting anything, was good fun!
IMG_4018.jpeg

Back piece fits on the piece towards the front, which means the bench seat still functions. They also both fit turned 90deg in the footwell if I want to store them that way. Hand holes cut into the ply really make it much easier to manoeuvre them around in the back.

Side note, does anyone have any ideas how I mount another bench seat beside the one in the pic above? I reckon I need some sort of bracket for the area in the photo below:
IMG_4012.jpeg

I know I'll need to drill some holes down thru the top of the wheel box for the vertical bench supports, but not sure what to do about that area for attaching the seat to the wall.

Photo below shows the threaded hole that is available on the other end for the bench to bolt to:
IMG_4013.jpeg
 

Similar threads