
GSF 109
Well-Known Member
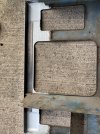
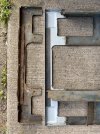
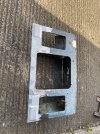
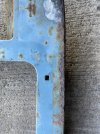
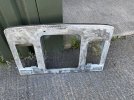
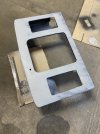
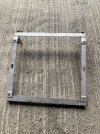
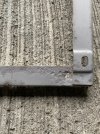
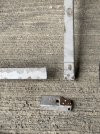
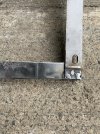
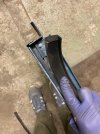
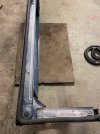
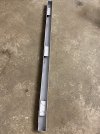
One disappointing point of the repair panel is that they don’t have return lips on the front faces to replicate the original , and that just annoys me! So, I cut some flat steel plate to size and bent it to shape and after some faffing around welded it. I managed to melt the raw edge into the new metal and put a bevel on it with the grinder. Not sure what will do with the other edges. I’ll sleep on it…..
Attachments

GSF 109
Well-Known Member
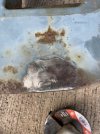
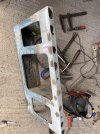
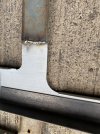
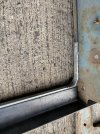
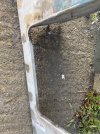
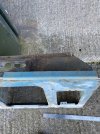
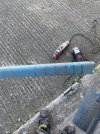
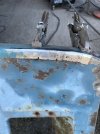
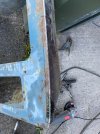
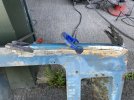
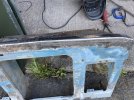
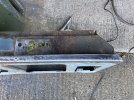
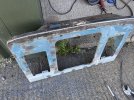
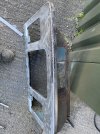
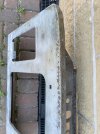
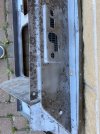
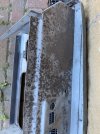
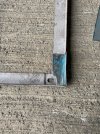
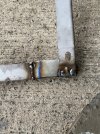
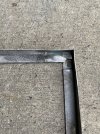
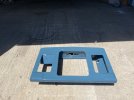
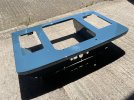
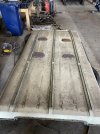
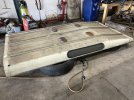
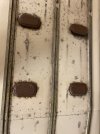
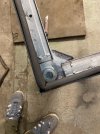
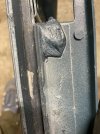
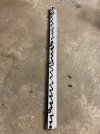
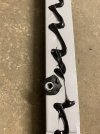
Okay, wee update for today on the front panel. I had a look at the landing angle on the top of the panel, and there appears to be fairly serious rust in that area. It must be where the rain drops track under the front of the bonnet and sits under the bonnet rest strip happily rusting away!
Anyway I cut out the worst section on the right hand side, folded up a repair section and welded it in.
Anyway I cut out the worst section on the right hand side, folded up a repair section and welded it in.
Attachments
-
 IMG_9425.jpeg709.8 KB · Views: 153
 -
 IMG_9426.jpeg459.4 KB · Views: 150
 -
 IMG_9427.jpeg522.5 KB · Views: 158
 -
 IMG_9428.jpeg752.8 KB · Views: 156
 -
 IMG_9429.jpeg333.4 KB · Views: 157
 -
 IMG_9430.jpeg393.4 KB · Views: 148
 -
 IMG_9431.jpeg390.6 KB · Views: 148
 -
 IMG_9432.jpeg434.4 KB · Views: 161
 -
 IMG_9433.jpeg550.4 KB · Views: 139
 -
 IMG_9434.jpeg627.4 KB · Views: 147
GSF 109
Well-Known Member
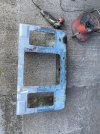
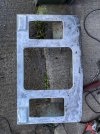
After trying to clean the rust and old paint off the front, I thought another solution was required, as the work to clean it satisfactorily would be really messy and would take forever  ….
….
….Attachments

GSF 109
Well-Known Member
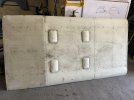
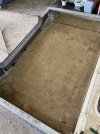
Step forward my new solution - get someone else to do it!  … Joking aside, this is definitely the best way to go… I took it to a local chap who refurbishes wheels, and he acid dipped and blasted it. There is no way on earth I would get it as clean as that! I’m so impressed I think I will give him a few other blasting jobs that would just take forever. I will paint it with Kurust first then get it filled, flatted and ready for painting.
… Joking aside, this is definitely the best way to go… I took it to a local chap who refurbishes wheels, and he acid dipped and blasted it. There is no way on earth I would get it as clean as that! I’m so impressed I think I will give him a few other blasting jobs that would just take forever. I will paint it with Kurust first then get it filled, flatted and ready for painting.Attachments


GSF 109
Well-Known Member
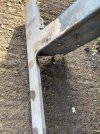
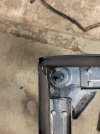
I stripped down the seat frames and rails to send them for blasting and powder coating and found on of the frames was corroded at the corner and holed. I thought a local repair would be sufficient as the rest was in good condition. In hindsight, a full repair section might have been neater, but it’s done now  .
.
.Attachments
Wagon Loon
Well-Known Member
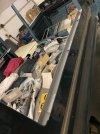
Hope soBeen quiet of late folks as I’m currently gutting out my workshop. Hopefully will be able to get alternative space sorted soon.
Cheers

GSF 109
Well-Known Member
steve2286w
Well-Known Member
a good job on that important bit, should last a long while now, have you got a new premises arranged of a good size , I’d hate having to move from my garage with all the junk in it and it’s just a normal size
GSF 109
Well-Known Member
Thanks - yes it’s been a real job sifting out nearly 20 years of ‘stuff’ and I’ve had to be ruthless to make even a dent in it! Many runs to the recycling and scrap man later and I’m making some progress. I managed to sell my cars and ramp, but obviously held onto the Landya good job on that important bit, should last a long while now, have you got a new premises arranged of a good size , I’d hate having to move from my garage with all the junk in it and it’s just a normal size
. It’s been quite cathartic in some ways but challenging considering all the memories wrapped up in what I sold/scrapped/gave away. It’s been good that my cars, (which I at least managed to get my money invested, back on), are going to people who will look after and use them. It’s up to them now to make new memories with them.I’m nearly there with the clear out, but as you know Land Rovers when disassembled seem to take up more space than you think by a magnitude of 4-1, so that’s my next task to sort that out.
Good news, hot off the press, is that I have secured a smaller space to work in, so I’m happy with that. Time to get the final clear up done, the Landy spares sorted out, then the big move can happen.
So a new phase begins, but at least I can keep going with my hobby!

GSF 109
Well-Known Member
Hi Folks, apologies for the lack of updates. Hope you have all been okay. Been really busy with life and all its up and downs! I’ve also spent far too much and money time on building a garden room in my back garden for the kids.
Now that’s done, I’m back on to the Landy!
Now that’s done, I’m back on to the Landy!
GSF 109
Well-Known Member
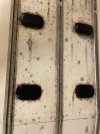
I had the roof prepped and painted in the original white before Christmas and hadn’t been able to do anything with it until now.
When I stripped the tropical roof skin off, I found some of the spacers that give you the gap between the two roofs were cracked and broken as were the rubber washers and bolts. I had to cut the securing bolts off as they were so corroded! I bought new fixings but changed them for stainless versions. However these were reasonably priced but the spacers were eyewateringly expensive for what they are….
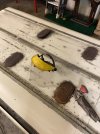
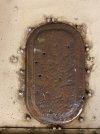
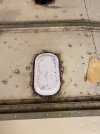
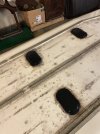
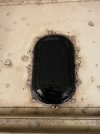
The roof vents were pretty corroded too, with the drivers side front showing some holes when cleaned up. I managed to repair it to a reasonable standard by using some fibreglass to seal up the holes and give some additional strength. This seemed to work okay and with a thin skim of filler its like new….ish. I gave the others a coat of Kurust and some black paint, so they should be fine.
When I stripped the tropical roof skin off, I found some of the spacers that give you the gap between the two roofs were cracked and broken as were the rubber washers and bolts. I had to cut the securing bolts off as they were so corroded! I bought new fixings but changed them for stainless versions. However these were reasonably priced but the spacers were eyewateringly expensive for what they are….
The roof vents were pretty corroded too, with the drivers side front showing some holes when cleaned up. I managed to repair it to a reasonable standard by using some fibreglass to seal up the holes and give some additional strength. This seemed to work okay and with a thin skim of filler its like new….ish
. I gave the others a coat of Kurust and some black paint, so they should be fine.Attachments
-
 IMG_9939.jpeg381.7 KB · Views: 64
 -
 IMG_9936.jpeg439.6 KB · Views: 86
 -
 IMG_9940.jpeg469.1 KB · Views: 70
 -
 IMG_9934.jpeg542.3 KB · Views: 63
 -
 IMG_0909.jpeg327.8 KB · Views: 57
 -
 IMG_0908.jpeg348.2 KB · Views: 69
 -
 IMG_0910.jpeg448.1 KB · Views: 72
 -
 IMG_0912.jpeg321 KB · Views: 62
 -
 IMG_0911.jpeg335.3 KB · Views: 76
 -
 IMG_1038.jpeg322.3 KB · Views: 71
 -
 IMG_1039.jpeg266.9 KB · Views: 78
GSF 109
Well-Known Member
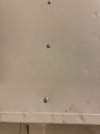
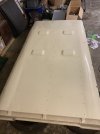
After sorting this out, I gathered all the fixings and loosely bolted the tropical roof skin on. The rivet holes lined up well so that was a good sign. I used some aluminium aircraft spec pop rivets to replace the originals. The eagle eyed ones will not miss the fact that I’ve left the dings and creases on the tropical roof skin. That’s deliberate as I don’t want to eliminate all the history of the vehicle…..I promise .
.Attachments

GSF 109
Well-Known Member
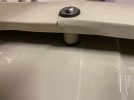
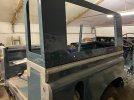
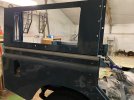
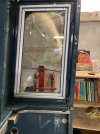
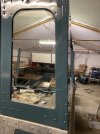
Next, I should have spent the time fitting the two alpine windows, but as the rear body upper sides have been sitting here for a while, I thought that I would move on to them instead. If I fit them on the Landy, then they are less likely to get damaged. I started by digging out the fixings and could I remember where they went on the panel…..not a chance! . After around an hours faffing around I managed to work it out. I also fitted a new rear lower to upper body seal. I cut a small relief in the corner to help it sit better. After some Purflex 40 application to ensure no chance of water ingress in the corner, I trial fitted the panel. Thankfully it all went swimmingly, so tightened it down. It’s really good to see the rear finally starting to look more complete!
Next time, I’ll do the same on the other side and hopefully fit the reinforcements, seals and some glazing - fingers crossed.
. After around an hours faffing around I managed to work it out. I also fitted a new rear lower to upper body seal. I cut a small relief in the corner to help it sit better. After some Purflex 40 application to ensure no chance of water ingress in the corner, I trial fitted the panel. Thankfully it all went swimmingly, so tightened it down. It’s really good to see the rear finally starting to look more complete! Next time, I’ll do the same on the other side and hopefully fit the reinforcements, seals and some glazing - fingers crossed
.Attachments
GSF 109
Well-Known Member
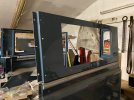
Did a few more jobs today. Thought I would try fitting the rear window just to give an impression that im making progress! . I cleaned off the original dum dum sealer from the glass and gave it a rub with some thinners to give it a good surface to adhere to. I tried to copy the original as far as possible. I then cleaned up the glazing strips but the aluminium was quite stained so I gave them a coat of steel wheel paint which I think gives a nice colour and finish. I then fitted it with new stainless screws.
. I cleaned off the original dum dum sealer from the glass and gave it a rub with some thinners to give it a good surface to adhere to. I tried to copy the original as far as possible. I then cleaned up the glazing strips but the aluminium was quite stained so I gave them a coat of steel wheel paint which I think gives a nice colour and finish. I then fitted it with new stainless screws.Attachments
GSF 109
Well-Known Member
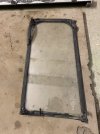
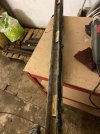
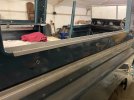
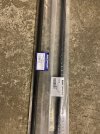
Thought I would tackle the o/s glass channel today. The channel itself was quite sound as it was galvanised, but the felt runners were completely shot and a pig to get out!
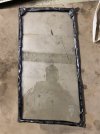
After some fighting and swearing I managed to get the channel stripped. I cleaned the small areas of rust and remnants of screws and sealant which was fun… anyway I got it painted with zinc spray and it looks much better!
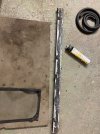
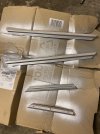
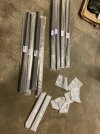
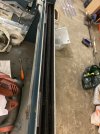
Following on, I used some Sika black sealer and dum dum strip for around the drain holes. I prefer the dum dum for around the drain holes as you end up with a mess using sealer. After this I cleaned, painted and fitted the closing strip which finished it off nicely.
I fitted the two bolts to hold the channel, then drilled and fitted the two bottom channels. Getting there!
After some fighting and swearing I managed to get the channel stripped. I cleaned the small areas of rust and remnants of screws and sealant which was fun… anyway I got it painted with zinc spray and it looks much better!
Following on, I used some Sika black sealer and dum dum strip for around the drain holes. I prefer the dum dum for around the drain holes as you end up with a mess using sealer. After this I cleaned, painted and fitted the closing strip which finished it off nicely
.I fitted the two bolts to hold the channel, then drilled and fitted the two bottom channels. Getting there!
Attachments
-
 IMG_1249.jpeg362.3 KB · Views: 74
 -
 IMG_1251.jpeg483 KB · Views: 66
 -
 IMG_1252.jpeg453.7 KB · Views: 69
 -
 IMG_1253.jpeg515.3 KB · Views: 72
 -
 IMG_1254.jpeg325.3 KB · Views: 61
 -
 IMG_1255.jpeg305.9 KB · Views: 67
 -
 IMG_1256.jpeg244.8 KB · Views: 73
 -
 IMG_1259.jpeg569.3 KB · Views: 70
 -
 IMG_1258.jpeg436.1 KB · Views: 69
 -
 IMG_1260.jpeg289 KB · Views: 69
 -
 IMG_1261.jpeg192.9 KB · Views: 71