GSF 109
Well-Known Member
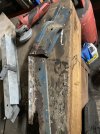
Once I buy some more flap discs, I’ll dress off the welds. I also need to take off the captive nut and strengthening plate from the top of the old’b’ pillar which holds the seatbelt bolt. I’ll weld it into this one so I can fit more modern seatbelts. I’ll also repair the’c’ pillar using Yrmit bits. I am starting to feel as if I’m getting decent progress now ")
GSF 109
Well-Known Member
After a clean up, I’ll fit it to the new sill after measuring it to make it the same as the other side. Then I’ll move on to the’c’ pillar and fit it up with the new YRM repair sections. They will need some fettling to make them ready for paint at that point, but at least they are solid!
GSF 109
Well-Known Member
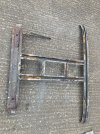
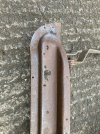
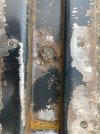
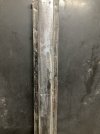
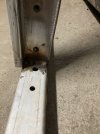
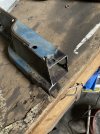
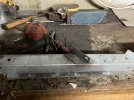
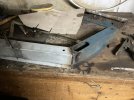
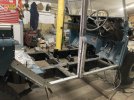
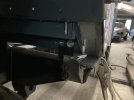
Okay, so a bit of a confession now………..after rebuilding the’b’ pillar, I thought it would be an idea to weld it onto the new sill. Which would have been fine, if I had welded it the correct way round! I welded it facing inwards rather than out the way. After turning the air blue for a few minutes, I cut it all back off again. This obviously made it much more difficult to align and reweld. Anyway, it’s all done and seems to be right now. I gave it a coating of anti rust ready for paint prep.
Attachments

GSF 109
Well-Known Member
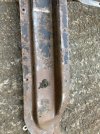
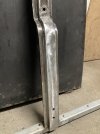
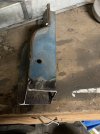
Next, I moved onto the ‘c’ pillar. I made a template to get the angle correct before welding then cut the rotten section off ready for the YRM section to be tacked on.
Attachments
GSF 109
Well-Known Member
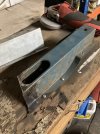
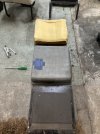
As an aside, before the’c’ pillar is fitted, I wanted to have a look at the second row seats as an upholster offered to redo them for me. No harm in getting a price, I guess? I stripped one down as they have faux sheepskin covers on them and I wanted to check the condition of the foam and frames. Unusually, the old vinyl has been left under the cover on the base but not the back. Also, it’s elephant grey, which I gather is a rare original colour? I got these from another car so it would have been original to it. Anyway, I got the price through from the upholsterer…..how much? Try £750…. Exmoor do a full set for half that…
Exmoor do a full set for half that…Attachments
codfather79
Well-Known Member
Nice job on the B & C pillars 
GSF 109
Well-Known Member
Many thanksNice job on the B & C pillars
 . Quite a satisfying job, and the YRM parts are great, but the challenge will come fitting it up and getting the alignment right

codfather79
Well-Known Member
Yes, YRM are excellent.Many thanks
I'm no welder so am going for the complete b, c and cill fully welded. Left and right! (£ouch!!)
LincolnSteve
Well-Known Member
That first go wasn't a mistake, it was just a practice go to get your eye in.Okay, so a bit of a confession now………..after rebuilding the’b’ pillar, I thought it would be an idea to weld it onto the new sill. Which would have been fine, if I had welded it the correct way round! I welded it facing inwards rather than out the way. After turning the air blue for a few minutes, I cut it all back off again. This obviously made it much more difficult to align and reweld. Anyway, it’s all done and seems to be right now. I gave it a coating of anti rust ready for paint prep.
GSF 109
Well-Known Member
I like your thinkingThat first go wasn't a mistake, it was just a practice go to get your eye in.
 . Sounds good to me!
GSF 109
Well-Known Member
I think, to be honest, that’s probably the way I would go if I was going to do it again, despite the extra cost. I have done it this way to try and save some cash, but the finish would be so much better using pre-fabricated brand new components!Yes, YRM are excellent.
I'm no welder so am going for the complete b, c and cill fully welded. Left and right! (£ouch!!)
GSF 109
Well-Known Member
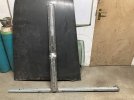
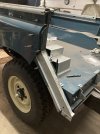
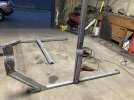
I finally finished off the drivers side sill and post assembly today. I decided to bolt up the rear of the sill rail and fix the front to the bulkhead before welding. I didn’t do that on the other side but i’m confident it will fit fine 
 .
.
The next job is to finish prepping them for paint.
. The next job is to finish prepping them for paint.
Attachments
GSF 109
Well-Known Member
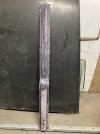
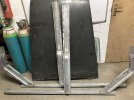
Managed to finally spend some time on the Landy today . Thought I would see if I could finish the prep work on the side frames. Did some rubbing down and filling to get them to a reasonable standard. Im going to take them to the painter next week, so wanted to get them done for that 
Attachments
GSF 109
Well-Known Member
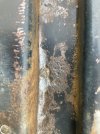
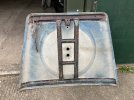
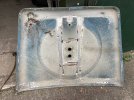
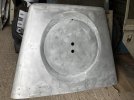
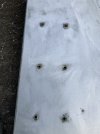
Moving on to the bonnet, after stripping the paint using paint stripper, there was still a lot of paint residue which needed removing. I used a 120 grit disc on a DA and it came off fairly easy. Unfortunately, the rivets prevented me cleaning all the paint round them and I didn’t want to leave it as it would look awful once painted. I took the decision to strip the inner frame off but I had the feeling I was opening a big can of worms! 
Attachments
GSF 109
Well-Known Member
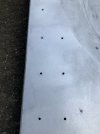
After examination, the inner frame was better than I thought it would be, but it’s still a bit frilly!