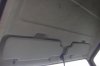
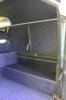
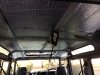
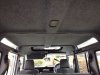
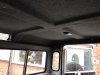
I just finished the refurb of my headliner and thought I would share the pics, a few tips that may help and thank all those who contributed to this excellent thread
")
I thought all headliners sagged so mine wasn't so bad but as I am looking to sell her I thought for around £50 it is a good upgrade. It took me 3 x 8hr days to complete it (this included the insulation) as I have the time and I ponder, point and drink tea.
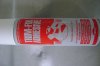
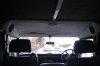
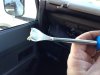
I would highly recommend you take pictures before you start as they come in handy... ie what way up do the second row grab handles go? Where are the original stud holes in the headliner? Look closely at the middle headliner... it only fits one way. Your sun visors can also be refitted wrong as I did it. You really need at get a 'stud removing tool' (see pic) a good craft knife and don't even think of starting the job if the wind is blowing. If it's a 110 CSW refit the front first.... I removed the cover and top bolt of the drivers side seat belt as this makes life easier... all the headliners will bend in the middle but take care. Then fit the back one and then the middle as it clumps over the others... I shorted out my interior lights twice, so remove the fuse first. If you have a sun roof just remove the interior seal, clean, a bit of fairy liquid refit it AFTER you you have refitted all the headliners.... I had to take mine off again to get the stud holes lined up... use a Phillips to push through the holes you have made in the headliner to fine the hole in the roof beams so you can line up before putting the studs in...
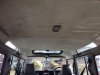
I went for a darker headliner but I would suggest the lighter one or you will have to do your sun visors as well... pain in the ass but it matches the carpet on the rear floor and side panels.
All I need now is matching furry dice.... oh and refitting your rear view mirror. You have to sit in the middle seat to get purchase (ask the wife about that) and WD40 the spring latch in the mirror first and see how it works. Push upwards first till you see it move up then push it in... if you try to push up and in at the same time you are working against yourself. I get mine in first time