Fishsponge i head down to Stevenage and Hatfield in Hertfordshire (from Worcester) sometimes, next time i head that way i could drop in and give you a hand if you want with what ever you are doing
 
Hey it's whatever you want to do fish. I havent totted the OEM totals up, but with he bars you get new nylok nuts, washers and greasable joints. Non of which are specified as standard.
 
right - to hell with the standard. I don't need the heavy duty aspect of the HD stuff, but the other aspects are tempting enough. I will order the HD items in a few minutes!

Mr. Noisy - I assume I can switch to the Terrafirma bars and steering damper, but still keep the snail thingy, right?

Anyway... in the mean time, my old wheels and tyres are up for sale!!

5x LAND ROVER 16 INCH "FREESTYLE" ALLOYS WITH 4x 245/75R16 MUD TERRAIN TYRES | eBay

Everyone go and bid!! (Only if you want them though, of course)

DSC_0002.JPG
DSC_0004.JPG
DSC_0005.JPG


DSC_0009.JPG
DSC_0010.JPG
DSC_0011.JPG


DSC_0013.JPG
DSC_0014.JPG
DSC_0015.JPG


DSC_0016.JPG
DSC_0018.JPG
DSC_0019.JPG


DSC_0020.JPG
DSC_0021.JPG
DSC_0022.JPG


DSC_0023.JPG
DSC_0024.JPG
DSC_0025.JPG


And here's the link again, in case you missed it :D

5x LAND ROVER 16 INCH "FREESTYLE" ALLOYS WITH 4x 245/75R16 MUD TERRAIN TYRES | eBay

Let's hope they sell... :D
 
Last edited:
Fishsponge i head down to Stevenage and Hatfield in Hertfordshire (from Worcester) sometimes, next time i head that way i could drop in and give you a hand if you want with what ever you are doing

Thanks for the offer, scrappyloz!

I'll try to get in touch next time i'm doing something i'm unsure of to see if you happen to be about!
 
Two questions... (the steering parts have arrived btw)...

First of all, I assume I am supposed to leave the flimsy-looking blue plastic cover in place on the steering damper to keep all the rubbish off the "actuator", right? The standard damper has a cover over it, but the cover on the new Terrafirma damper looks like it could be part of the packing material rather than the dirt cover... it's really quite flimsy.

Secondly, I have been told at the recent wheel geometry and the previous one that my rear axle is out of alignment (thrust angle, I guess). I realise this could be trailing arm bushes (although unlikely in my case as they are new) or something being bent, but if you have a look at the table linked to below, would you consider it within tolerance or should I actually shim one of the trailing arms before I have the wheels aligned again?

Land Rover Wheel Alignment and Steering Wheel/Drag Link Adjustment | Richard Hobbs
 
Right! I've worked out that to get the rear axle back inline I will need to lengthen the left-hand trailing arm by 11mm!!!

What the hell happened to need the trailing arm shimming that amount?!? :eek::D

The diagonal measurements from front-left to rear-right and vice versa differ by about 33mm, and working on the more recent rear wheel toe-in and toe-out values, shows the front of the left wheel needs to go to the left by 2.9mm (I assume at the edge of the rim) and the front of the right wheel needs to go to the left by 1.6mm.

I normally wouldn't care this much, but if the rear trailing arm needs shimming by 11mm something must be seriously out of shape... surely...
 
It's a rubber boot mate and yes it's supposed to be there!

f06cf0b2.jpg


If the car is lifted then the front axle could be out because the panhard rod is at the wrong angle. Probably not possible with 2" but who knows.
 
well that does look like the same steering damper that I have got, but your rubber boot looks much, much better than mine!!

Yours looks like a nice corrugated rubber type arrangement. Mine is a flimsy plastic cylinder with the end cut off so it slides over the thick part of the damper covering up the "Terrafirma" logo as it compresses.

I don't care that it cover up the logo, of course... just trying to explain what it's like.

Did you ever use one of those cheap push/pull baloon inflaters? It's a bit like one half of one of those.

And it is fixed at the "small" end, so any crap can still enter from the "fat" end if that makes sense. I'll try to get a photo soon...
 
OK, here it is...

26656d1322075254-fishsponges-ongoing-thread-problems-photo-1.jpg


26657d1322075254-fishsponges-ongoing-thread-problems-photo-2.jpg


26658d1322075254-fishsponges-ongoing-thread-problems-photo-3.jpg


Doesn't yours look so much better quality?

Mine looks like a rock would hit it and snap it off!
 

Attachments

  • photo 1.JPG
    photo 1.JPG
    189.7 KB · Views: 194
  • photo 2.JPG
    photo 2.JPG
    162.8 KB · Views: 192
  • photo 3.JPG
    photo 3.JPG
    162.8 KB · Views: 188
Last edited:
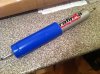
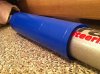
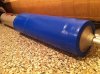
So... apart from the steering damper cover looking really cheap and nasty, I have a few questions...

Thanks to Mr. Noisy for the procedure for changing this all over. It looks so damn simple even without a procedure to be honest, but Mr. Noisy's procedure will be followed!

I've had a look in Haynes for the measurements and looked at their procedure for doing this too.

why do I need to disconnect the battery negative terminal before I remove the drag link and also for the track rod?!? Do i really have to do that? i assume not... surely the battery can stay connected throughout this entire procedure, right?

Also, the measurements given in Haynes for the drag link are 28.5mm from Balljoint centre to drag link end and 924mm for Balljoint centre to Balljoint centre. So, in summary, I need to make the drag link 924mm long from centre of grease nipple to centre of grease nipple. Do i really need to care about the 28.5mm measurement given that I have Terrafirma HD replacements?

As for the track rod, the measurements given in Haynes are 9mm for Adjuster sleeve to track rod, 28.5mm for Balljoint centre to track rod end and 1230mm for Balljoint centre to Balljoint centre. Presumably I can ignore the 9mm and 28.5mm measurements and just use 1230mm from centre of grease nipple to centre of grease nipple, right?

Also, what is the "specified torque setting" for the drag link and track rod retaining nuts? I can't find those values in the Haynes.

I'm also supposed to secure each nut with a new split pin... but I don't see any of these in the kit. I'll have a closer look later tonight though because it should contain them...

It also says I should stick the axle stands under the chassis... I normally put them under the axle because I don't have to stretch the bottle jack to it's limits... is anything wrong with that?
 
Theyve changed the damper cover. The New plastic one is more similar to the original metal shield. The boot i had wasnt perfect tbh. I wouldnt use one in fairness, easier to clean.

Don't disconnect battery.

You only need to bother with the 924 and 1230 measurement. As I said wind both joints all the way in, and then equally wind them out by twisting the rod, until you get your specified length.

The torque settings for retaining nuts? Do you mean locknuts or the nyloks that hold the joint into the taper? Either way, just do them nice and tight. You will need a couple of big scanners for the locknuts, one to hold the rod and one to tighten the locknut against it. You will need a 19mm spanner to tighten the nyloks.

It doesn't contain split pins. The terrafirma kit is much more up to date using the aforementioned nylok nuts instead of castle nuts and split pins. The nylon ring grips tight and stops the nut working loose.

Axle stand under the axle is perfect, I put mine next to the radius arm, in the gap between it and the swivel ball.

Cheers :)
 
Thanks for the reply!

I will leave the crappy plastic cover on the damper, of course, and I won't disconnect the battery. Why the hell would Haynes tell you to disconnect the battery for a drag link replacement?!? that seems utterly ridiculous! lol

Anyway, I will set the drag link to 924mm and the track rod to 1230mm from the centre of each grease nipple and ignore the other measurements given.

Regarding the "retaining nuts", this is what the Haynes manual says I should tighten to to the "specified torque setting" uselessly enough!

I assume it means the nylocs that hold the joint into the taper because it's very hard to tighten the locknuts to a specified torque because you can't get a socket on them, of course!

I have since looked it up in Rave and the "Ball joint nuts" are to be at 40Nm and the "Tie bar to mounting nut" should be 110Nm. I assume the "tie bar to mounting nut" is something completely different and I should therefore just do up the locknuts nice and tight and tighten the balljoint nuts to 40Nm.
 
You will be working in the region of the starter motor so be careful not to touch the terminal with the end of a spanner while working under there.

It would be unlikely but Haynes have to cover any possible hazards.
 
good... i cannot think of a single other question, so as long as I can get 6 nuts undone and 4 ball joints freed up, all should be good!

Oh, and I worked out today I'm going to have to extend the left-hand trailing arm on the rear axle by 11mm in order to straighten out the rear wheels (one of which is toed in and the other toed out, strangely).

Having the wheel alignment checked again tomorrow somewhere else (for free) to get their opinion on the position of the rear axle!

You will be working in the region of the starter motor so be careful not to touch the terminal with the end of a spanner while working under there.

It would be unlikely but Haynes have to cover any possible hazards.

worth knowing! I will be careful. It has an immobiliser anyway, so I would assume nothing would happen regardless, but I will be sure to stay clear!
 
Last edited:

Similar threads