mcbrl

Member
Hello,

I am about the exchange the rear diff on my Discovery 2 2004 - remove one, put in another one.

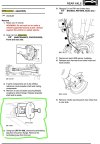
From the workshop manual, step 5 says that the "centralizing peg" must be removed.

However, the new diff coming in already has the centralizing peg / pinion. Is this step really necessary?

Thanks!
 

Attachments

  • Screenshot 2024-10-02 at 12.23.24.jpg
    Screenshot 2024-10-02 at 12.23.24.jpg
    245.9 KB · Views: 56
Hi you dont need to remove it it you just doing a stright swop, but, you do if you need to carry out any work on the diff once it installed , like new oil seal, or check the Preload after replaceing a set of pinion bearing, you will plus if you remove it now it would be easier if at alater date you need to do the oil seal etc
 
thanks - but I can that after I remove the diff from the axle right? I don’t need to do it at « step 5 » while under the vehicle?
 
thanks - but I can that after I remove the diff from the axle right? I don’t need to do it at « step 5 » while under the vehicle?
It is a sod to do at the best of times, it doesn't sound like you need to do it at the moment provided it came to you as "all good"
but if you do need to remove it it is far better to do it on the bench.
 
removing the diff means you need to pull the halfshaft out as they fit in the diff so best to do any work before you just swop it
 
Last edited:
Hello,

I am about the exchange the rear diff on my Discovery 2 2004 - remove one, put in another one.

From the workshop manual, step 5 says that the "centralizing peg" must be removed.

However, the new diff coming in already has the centralizing peg / pinion. Is this step really necessary?

Thanks!
You say it is a "new diff" now how new is "new"?
Cos if it really is new or at least reconditioned, you shouldn't need to do any work on it at all.
If it is merely secondhand then get back to us so we can tell you what to look for as regards "work" on it before you try to pull it apart, maybe pointlessly.
 
It is not really brand new - I bought it second hand. I followed a few guides and measured "play" and also the gear imprints using that blue thing. It appears to follow the guidelines.

The whole reason I am trying this debacle is here:


(I believe most of you have already helped in all threads with suggestions and answers, thanks!)

I have already replaced the rear wheel hubs with brand new ones - and the noise is still there. So next up would be to take of the rear diff and put another one (at least to verify if the noise goes away).

Open to other suggestions :)
They are heavy to take out and put back in but otherwise not too difficult. I did mine by hand but at the weight they are I don't think I could/would do it again now, but you can do them with a decent trolley jack to help lift them and lower them. Just need a new gasket, cleaning and then putting back into place, with a suitable sealant.
Did you use a Dial Test Indicator to measure the play between the pinion gear and the crown wheel gear?
Thanks for the tips - yes I did buy one of those test dial indicators, play seems fine. The blue marks are not perfect but thats what I have. My intension is to isolate the culprit - if the noise disappears (or changes) then most likely it is the diff.

I have not seen gaskets for the diff - is RTV or other silicone ok?
 
It is a while since I did mine.
But I think the gasket was only paper. I think I simply put grease on both sides (old skool) then fitted it and torqued up the bolts.
RTV would be OK, just a thin smear.
Really important to make sure both mating surfaces are clean.
I'm a bit concerned by the remark that the blue marks are not perfect. a bit more detail would help.
But if a diff has any wear on it at all this would be what you are seeing using engineer's blue.


From https://www.google.com/search?q=tes...wMTQ3ajBqMTWoAgiwAgE&sourceid=chrome&ie=UTF-8
 
It is a while since I did mine.
But I think the gasket was only paper. I think I simply put grease on both sides (old skool) then fitted it and torqued up the bolts.
RTV would be OK, just a thin smear.
Really important to make sure both mating surfaces are clean.
I'm a bit concerned by the remark that the blue marks are not perfect. a bit more detail would help.
But if a diff has any wear on it at all this would be what you are seeing using engineer's blue.


From https://www.google.com/search?q=testing+a+crown+wheel+and+pinion+with+engineer's+blue&rlz=1C1ONGR_enGB1008GB1008&oq=testing+a+crown+wheel+and+pinion+with+engineer's+blue&gs_lcrp=EgZjaHJvbWUyBggAEEUYOTIHCAEQIRigATIHCAIQIRigAdIBCjIwMTQ3ajBqMTWoAgiwAgE&sourceid=chrome&ie=UTF-8

I pulled my diff cover off last week & used rtv sealant, I used to make all my own gaskets n grease em now rtv is the way
got the tube thats pressurised so no faffing about with a stupid silicone gun.
 
I pulled my diff cover off last week & used rtv sealant, I used to make all my own gaskets n grease em now rtv is the way
got the tube thats pressurised so no faffing about with a stupid silicone gun.

Thanks for the clarifications - I did find the gasket locally but I think I am going for the RTV option as well.
 
It is a while since I did mine.
But I think the gasket was only paper. I think I simply put grease on both sides (old skool) then fitted it and torqued up the bolts.
RTV would be OK, just a thin smear.
Really important to make sure both mating surfaces are clean.
I'm a bit concerned by the remark that the blue marks are not perfect. a bit more detail would help.
But if a diff has any wear on it at all this would be what you are seeing using engineer's blue.


From https://www.google.com/search?q=testing+a+crown+wheel+and+pinion+with+engineer's+blue&rlz=1C1ONGR_enGB1008GB1008&oq=testing+a+crown+wheel+and+pinion+with+engineer's+blue&gs_lcrp=EgZjaHJvbWUyBggAEEUYOTIHCAEQIRigATIHCAIQIRigAdIBCjIwMTQ3ajBqMTWoAgiwAgE&sourceid=chrome&ie=UTF-8

Thanks for the links! Interesting gear pattern reference - I will take a few photos and post here for discussion.
 
Hi all,

I have recorded the gear marks, play, etc of the rear diff I bought. If you guys could take a look? (@Stanleysteamer I think you can take a look at the measurements in the video below)


Thanks!
 
Hi all,

I have recorded the gear marks, play, etc of the rear diff I bought. If you guys could take a look? (@Stanleysteamer I think you can take a look at the measurements in the video below)


Thanks!

Just for comparison, here is how I mounted my diff so I could get an accurate measurement of pinion-crownwheel play.
1728469747675.jpeg


you'll note the pinion flange clamped to the bench with a bolt and a socket.

1728469874598.jpeg

1728469953724.jpeg


so the play was 6.5 thou. you can convert that into 100ths of a millimetre. 0.01651 I think.

I would suggest redoing, it mounting your DTI so it measures like mine does, I was careful to keep it at right angles to the flange of the diff resting on the same place on the gear.
I don't think your measurement of play there is valid. but others may disagree.
I followed a vid I had seen which basically said this:
"
To measure play in a differential crown wheel with a dial test indicator, you can:


  1. Attach the dial indicator to the axle housing or gear case.


  2. Position the indicator so that it touches a tooth on the ring gear's outermost diameter.


  3. Ensure the indicator is at a 90-degree angle to the tooth face.


  4. Gently rock the carrier back and forth to measure backlash.


  5. Repeat in three different locations on the ring gear to check for runout.
Here are some other tips for using a dial indicator:


  • To measure backlash on a ring gear, only turn the gear, not the pinion.


  • To read a dial indicator, note the zero position where the needle aligns with the reference point.


  • Each graduation on the dial face represents 0.001 units.


  • Dial indicators can take measurements from 0.001 inch to 50 millionths of an inch. "
from https://www.randysworldwide.com/blogs/gear-backlash

Loads of vids.


Plus this on how to read the marks you made.


looks like you may need a thinner pinion shim.


It's up to you.
 
Last edited:
Thanks a lot for your picture on how to secure the diff - I was struggling with that!

I will take a look at these references and get back here, thanks again!
 

Similar threads