UpandOver
Well-Known Member
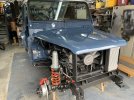
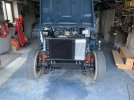
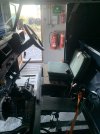
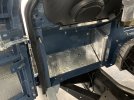
We what can I say… the maiden voyage was like something from Mad Max … deck chair cushions as a seat, some thrown together bracketry to hold the expansion bottle, cable tied fuel filter and were away down the road ! Wind in my hair, anti freeze in my eyes and lungs full of diesel fumes oh what a ride !
Attachments
UpandOver
Well-Known Member
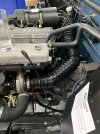
Changed the theromstat for one that worked and the guage was still showing off the scale ??? Put a multimeter on the temp sensor and it reading 115ohm which in defender speak should be lava…. Some more googling and yes you guessed it I’ve only gone and frigging fitted a green Discovery temp sensor !
This does harken back to the same problem that I had with the series 3… lesson learnet
This does harken back to the same problem that I had with the series 3… lesson learnet
myfirstl322
Well-Known Member
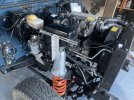
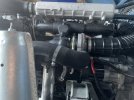
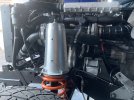
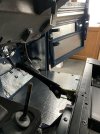
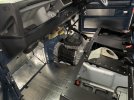
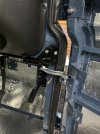
The kink in the turbo oil feed must Shirley be doing your nut then?Have to admit the 300tdi is a good looking engine …. It does complement my OCD perfectly
")
UpandOver
Well-Known Member
UpandOver
Well-Known Member
Replacement pipe ordered today !The kink in the turbo oil feed must Shirley be doing your nut then?

UpandOver
Well-Known Member
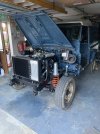
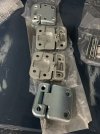
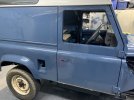
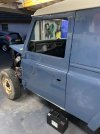
Door hinges paint dried I spent the evening aligning the front doors, driver side went on perfectly but the passenger one was another story… after some gentle bulk head adjustment with a ratchet strap and rear tub lifting with a 4x2 were there !
Attachments
LincolnSteve
Well-Known Member
That’s the sort of door alignment that the rest of us dream of.
LincolnSteve
Well-Known Member
Don’t ask me. The more of mine that I reassemble the more I realise that I can’t get anything to just line up. 


UpandOver
Well-Known Member
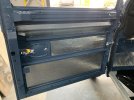
Todays fetteling consisted of fitting the seat box, handbrake and drivers floor. Passenger floor to follow once the cable grommets arrive for the battery cables. Decided to cover all the floor and doors in sound deadening, what a difference its made to the doors ! They dont sound likes some sardine tins anymore. Going to do the same to the roof and rear tub, before I carpet the rear and put the head lining in. May do the rear side panels with some black
Attachments

LincolnSteve
Well-Known Member
They're better that the series ones. Series 3 anyway.