tottot
Well-Known Member
Last couple of day's been sorting swivel housing big seal. Did NS last month for MOT no issues, however on OS other issues came to view. Brake flexi ferrule very corroded [ tester missed that] spring pan starting to collapse, patch of rot at top of turret. As it's off caliper will have overhaul.
What I would like to note here is how worthwhile it is keeping undercarriage oiled up. All 14 swivel housing bolts came un done and have/will go back as will caliper bolts. Even the nuts on the ring holding the shock turret came free [never been off before] Bump stop also came off.
Lower shock nut came free with some effort but as is usual hole in it's bracket needed a fix. I welded a bit of suitable pipe in and ground excess flat before fitting new pan.
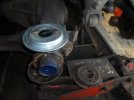
Tip, Spray can cap fits just nice in axle end to keep the crud out while work in progress.
Attachments
Hicap phill
Well-Known Member
Mrs been driving motor this week and says headlight crap.

Light Grill off and trace earth back. Remove wheel arch and find earth cable broke. Now this was from main loom so unsure why side light/indicators still worked.
Lights now fixed
Now onto horn.
Remove front grill and once again find the earth cable broke. Fix,check and now good.
Heater.
Hot/cold controller cable must be stuck slightly. As winter is coming I just locked it over to hot.
Found hub plastic end cap broke so will need replacing soon
Air filter needs a bit of a clean while you're at it.Mrs been driving motor this week and says headlight crap.
View attachment 328861
Light Grill off and trace earth back. Remove wheel arch and find earth cable broke. Now this was from main loom so unsure why side light/indicators still worked.
Lights now fixed
Now onto horn.
Remove front grill and once again find the earth cable broke. Fix,check and now good.
Heater.
Hot/cold controller cable must be stuck slightly. As winter is coming I just locked it over to hot.
Found hub plastic end cap broke so will need replacing soon
Hicap phill
Well-Known Member
Did take it in & wash it. Put on radiator to dry & re oil. Will be good for another 12 months.Air filter needs a bit of a clean while you're at it.
Passed.Hopefully nothing, currently sat watching my TD5 having its MOT.
Hicap phill
Well-Known Member
Replaced stub end cover…well it lasted

As I was in my local 4x4 indi got a new 1(& a spare) found out there are 2 types.mine is the early version(later version smaller in height)

As I was in my local 4x4 indi got a new 1(& a spare) found out there are 2 types.mine is the early version(later version smaller in height)
Big job, how many coffee breaks did you have?Replaced stub end cover…well it lasted
View attachment 330104
As I was in my local 4x4 indi got a new 1(& a spare) found out there are 2 types.mine is the early version(later version smaller in height)
View attachment 330105
Took the injection pump of the tdi to send it away.
Changed the water pump gasket for genuine Land Rover as the previous one has lasted about 100 miles.
Noticed rear brake cylinder leaking. Had a spare fitted that but the brake pipe broke, had a spare but seems like it may be off a 110 or packaged up wrong. Had to bend it about to make it fit without the correct tools, not easy as it's one of them green pipes which I think might be steel? Whatever it was pretty strong and now fits, sort of!
I've started taking my transfer box to pieces this weekend. It's leaking oil and so far I have kept going by topping it up but it's getting to the point where new seals and gaskets are needed.
Right, seats out, cubby box out, mats out, handbrake lever out:

You can see how juicy it looks down there. Transmission tunnel out:

That area was pristine in January 2021 when I fitted a reconditioned gearbox. It's certainly got dirty since. Oil out next. The drain plug is getting into the festive spirit with is own little Christmas tree:
 On rubbing it between finger and thumb, there aren't any big lumps in there. It's more a kind of grey paste. So maybe thing aren't as bad as all that.
Props off next. Oh no, I can't. The captive bolts at the handbrake end have liberated themselves and spin freely. Hmm. How am I going to get those out? Fortunately I have a die grinder and a set of tungsten carbide burrs. So the nuts ended up looking a bit like this:

I just ground them away until there was hardly anything left clinging on to the bolts. I can't find any 3/8" UNF bolts the right length in the house so I may have to order some.
Eager to get a scent of EP90 in my nostrils, I took the input shaft out:
 The teeth look fairly decent still. It's not shaped like a circular saw. Indeed, if I didn't know which way round it goes, I'd be hard pressed to tell which was the loadbearing side of the teeth. With all that done, I could start disconnecting earth wires, warning light cables and gear shift mechanisms, then undoing the bolts and lowering the transfer box so that the entire weight was suspended on a breather pipe. Forgot about that one. On bringing it inside and taking the sump off, the gears look like they're reasonably happy and will go back in for another round:
 Those bright spots aren't chips, it's just how the light is catching them. So far the bearings look OK too - the rollers are nice and round and shiny. I've seen roller bearings in the past where the case hardening has delaminated off the rollers in big flakes, so I'm always on the lookout for that sort of thing. But it looks to me like it just needs seals and gaskets on this occasion. Tomorrow I'll change the seals on the intermediate shaft (which is why its out of the vehicle) and start putting things back together.
Right, seats out, cubby box out, mats out, handbrake lever out:
You can see how juicy it looks down there. Transmission tunnel out:
That area was pristine in January 2021 when I fitted a reconditioned gearbox. It's certainly got dirty since. Oil out next. The drain plug is getting into the festive spirit with is own little Christmas tree:
Props off next. Oh no, I can't. The captive bolts at the handbrake end have liberated themselves and spin freely. Hmm. How am I going to get those out? Fortunately I have a die grinder and a set of tungsten carbide burrs. So the nuts ended up looking a bit like this:
I just ground them away until there was hardly anything left clinging on to the bolts. I can't find any 3/8" UNF bolts the right length in the house so I may have to order some.
Eager to get a scent of EP90 in my nostrils, I took the input shaft out:
Good work.I've started taking my transfer box to pieces this weekend. It's leaking oil and so far I have kept going by topping it up but it's getting to the point where new seals and gaskets are needed.
Right, seats out, cubby box out, mats out, handbrake lever out:
View attachment 330131
You can see how juicy it looks down there. Transmission tunnel out:
View attachment 330132
That area was pristine in January 2021 when I fitted a reconditioned gearbox. It's certainly got dirty since. Oil out next. The drain plug is getting into the festive spirit with is own little Christmas tree:
View attachment 330133On rubbing it between finger and thumb, there aren't any big lumps in there. It's more a kind of grey paste. So maybe thing aren't as bad as all that.
Props off next. Oh no, I can't. The captive bolts at the handbrake end have liberated themselves and spin freely. Hmm. How am I going to get those out? Fortunately I have a die grinder and a set of tungsten carbide burrs. So the nuts ended up looking a bit like this:
View attachment 330134
I just ground them away until there was hardly anything left clinging on to the bolts. I can't find any 3/8" UNF bolts the right length in the house so I may have to order some.
Eager to get a scent of EP90 in my nostrils, I took the input shaft out:
View attachment 330135The teeth look fairly decent still. It's not shaped like a circular saw. Indeed, if I didn't know which way round it goes, I'd be hard pressed to tell which was the loadbearing side of the teeth. With all that done, I could start disconnecting earth wires, warning light cables and gear shift mechanisms, then undoing the bolts and lowering the transfer box so that the entire weight was suspended on a breather pipe. Forgot about that one. On bringing it inside and taking the sump off, the gears look like they're reasonably happy and will go back in for another round:
View attachment 330137Those bright spots aren't chips, it's just how the light is catching them. So far the bearings look OK too - the rollers are nice and round and shiny. I've seen roller bearings in the past where the case hardening has delaminated off the rollers in big flakes, so I'm always on the lookout for that sort of thing. But it looks to me like it just needs seals and gaskets on this occasion. Tomorrow I'll change the seals on the intermediate shaft (which is why its out of the vehicle) and start putting things back together.
I guess now isn't the time to tell you the intermediate shaft o ring can be changed it situ.
Unfortunately the rear of my R380 partially covers the front end so that's not possible on mine. I'm sure you can on some of the earlier ones. I'm positive I remember having the intermediate gears out of the transfer case in situ on our old Series 2 Forward Control back in the 1980s. I was lying on my back underneath and my brother was reaching down from above. Ah, happy days.Good work.
I guess now isn't the time to tell you the intermediate shaft o ring can be changed it situ.
Did it on my R380, you do have to slide the transfer box backwards a bit, so it's almost out but no heavy lifting needed.Unfortunately the rear of my R380 partially covers the front end so that's not possible on mine. I'm sure you can on some of the earlier ones. I'm positive I remember having the intermediate gears out of the transfer case in situ on our old Series 2 Forward Control back in the 1980s. I was lying on my back underneath and my brother was reaching down from above. Ah, happy days.
Well once it's unbolted from the primary gearbox, it's easier to bring it indoors anyway, so I can work standing up out of the rain. I'd been lying on my back too long at that point. I could grind a bit out of the flange on the back of the R380 - it shouldn't weaken it too much. But then I don't need to do this job very often - this is only the second time in 170,000 miles. By the time I need to do it again I might need a new R380 anyway.Did it on my R380, you do have to slide the transfer box backwards a bit, so it's almost out but no heavy lifting needed.
s8ndst0rm
Well-Known Member
Almost finished fitting my Slickshift until the heavens opened.
Photos have been added here:
https://www.landyzone.co.uk/land-rover/good-grease-or-bad-slime-in-gear-shift.395871/post-5773658
Photos have been added here:
https://www.landyzone.co.uk/land-rover/good-grease-or-bad-slime-in-gear-shift.395871/post-5773658
I took a look under the 90 today. Turns out the downpipe has failed just before the intermediate pipeCentre exhaust mount has broken. The 90 started making quite a notice on the journey home from work at 2330 last night.
Forrest Gump
Well-Known Member
Started putting soundproofing in the 90. Done the load bay. Going to have a swing at the seat box area tomorrow, floor wells etc and the the bonnet, got the bonnet kit and a new soundproof mat…a very big rat had moved in and had a nice gaff made for himself. Really hope all this helps with the noise. Going to finish the cab off with the moulded mat system when I get a couple spare quid. Should be an easy job too. 


