SPLRover

Member
Hi All,

Does anyone have experience of repairing the inner wing panels that attach to the inside of the headlight panels? Mine are rotten and it seems from what I can see that you cannot purchase these without buying a complete wing assembly.

Appreciate any advice anyone can give on purchasing replacements or repairing.


6569CCC1-7DC1-4FE3-9B59-0256833100E8.jpeg
DE4720AD-F20C-422F-868B-A42C93E43BF3.jpeg
CEB2BB19-6BC5-473F-927F-EDFF1E1C0896.jpeg
 
If you can make up the side panel and channel you could rivet and bond it back together.
Other options would be good section hand or new wing.
 
Road signs (Road closed, that sort of thing), a jig saw, a file and some rivets.

Cut out the rot, make a bit that fits exactly.
Rivet several pieces (square/rectangle shaped) inside the hole.
Offer up the new piece so it's flush.
Coat the touching parts with Sikaflex or Tiger seal and rivet them in place.
Fill the small gaps.
Paint with Hammerite special metals primer, inside and out.
 
Last edited:
Road signs (Road closed, that sort of thing), a jig saw, a file and some rivets.

Cut out the rot, make a bit that fits exactly.
Rivet several pieces (square/rectangle shaped) inside the hole.
Offer up the new piece so it's flush.
Coat the touching parts with Sikaflex or Tiger seal and rivet them in place.
Fill the small gaps.
Paint with Hanmmerite special metals primer, inside and out.
^^^This is what I would do. I’ve got a sheet of aluminium I’ve had for years and it has been used for exactly this kind of repair. With some carful folding in the vice you could make the hollow section piece up. Cut all the corroded crap away first though and don’t try and hide it. It will just spread.
 
I did get some stuff for sort of "soldering" ally when I was changing my chassis. Bloody expensive stuff, but I managed to attach a bit of ally angle to a bit of plate as practice. Just needed care and a blowlamp. I think that would be more reliable than rivets.
 
I did get some stuff for sort of "soldering" ally when I was changing my chassis. Bloody expensive stuff, but I managed to attach a bit of ally angle to a bit of plate as practice. Just needed care and a blowlamp. I think that would be more reliable than rivets.

Probably with new alluminium.

The type of 'welding' you are talking about is commonly seen at the motor shows sold by a Norwegian/Swedish guy.
This 555 Al Solder Self-Fluxing wire does need a lot of heat and is great, on new alluminium.
On an old, thin, landrover panel I have doubts that it would be any good, it will certainly destroy any paint effectively creating more work.

I'd possibly try to weld the new alluminium signage together but not the new to the old panels.
Good luck whatever you try.
Post your progress and pictures.
 
Last edited:
Thanks All, advice much appreciated. Will get some pics up shortly. Truck now fully disassembled and new chassis getting delivered over next few days and will commence the build. Thoughts so far, an enjoyable experience, they really are hobbyist vehicles and I've been surprised in that not all Defender parts are as readily available as I thought and I'm glad I didn't bin everything that seemed knackered as some suggested (have refurbished quite a few parts).
 
I did get some stuff for sort of "soldering" ally when I was changing my chassis. Bloody expensive stuff, but I managed to attach a bit of ally angle to a bit of plate as practice. Just needed care and a blowlamp. I think that would be more reliable than rivets.
Nothing wrong with rivets. Most of your vehicle is held together with them.
 
As above re rivets.
I did this.
Before
View attachment 301431

View attachment 301432
After
View attachment 301433
I used cereal box cardboard to template the shapes needed to cut the aluminium.
Here it is after a trip to the paint shop having it's first dry fit.
View attachment 301434
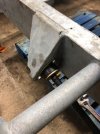
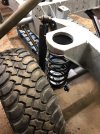
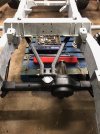
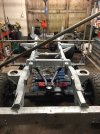
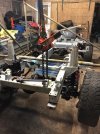
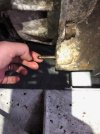
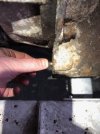
Hi All, some pics of progress. Fitted new clutch today (Valeo) and have encountered what seems to be an issue. Engine is a Defender 200 TDI, mated to an LT77 transmission which was fitted previously to a Discovery 200TDI which I scrapped. The pin which depresses the clutch fork is passing straight inside the flywheel housing and does not seem right, i.e. it appears that the slave cylinder pin will not be able to function.

Any advice?

Are there any LT77 differences between the Discovery and Defender?

Clutch kit I bought is for a Defender 200 TDI.

Thanks
 

Attachments

  • 428FDDD1-48B8-40C3-81A9-10B24CF39002.jpeg
    428FDDD1-48B8-40C3-81A9-10B24CF39002.jpeg
    63.3 KB · Views: 78
  • CB196A5F-01F0-43F3-A513-ED4EFFFEAA4E.jpeg
    CB196A5F-01F0-43F3-A513-ED4EFFFEAA4E.jpeg
    81.7 KB · Views: 84
  • 2E1F20B5-49A0-4351-AC48-4EE0B22B1FEF.jpeg
    2E1F20B5-49A0-4351-AC48-4EE0B22B1FEF.jpeg
    73.2 KB · Views: 90
  • ED4FDD9E-5175-4578-B48B-E65436E70BF2.jpeg
    ED4FDD9E-5175-4578-B48B-E65436E70BF2.jpeg
    86.2 KB · Views: 84
  • 5B82C530-B9A0-4B01-A0AF-2A69B45CE981.jpeg
    5B82C530-B9A0-4B01-A0AF-2A69B45CE981.jpeg
    91.7 KB · Views: 90
Hi All, some pics of progress. Fitted new clutch today (Valeo) and have encountered what seems to be an issue. Engine is a Defender 200 TDI, mated to an LT77 transmission which was fitted previously to a Discovery 200TDI which I scrapped. The pin which depresses the clutch fork is passing straight inside the flywheel housing and does not seem right, i.e. it appears that the slave cylinder pin will not be able to function.

Any advice?

Are there any LT77 differences between the Discovery and Defender?

Clutch kit I bought is for a Defender 200 TDI.

Thanks
What do you mean by pin, The connecting rod at the end of the fork? What do you mean by passing straight inside the flywheel housing?

I am struggling to visualise exactly what the problem is. Do you have any photos of the specific issue?
 
What do you mean by pin, The connecting rod at the end of the fork? What do you mean by passing straight inside the flywheel housing?

I am struggling to visualise exactly what the problem is. Do you have any photos of the specific issue?
Hi Dag, referring to the push rod from the slave cylinder it is passing right inside the housing and not working the fork. If there are differences between defender and discovery this could be the issue, I'm not sure if there is a way to possibly change the pin if so without splitting the gearbox from the engine.

So, a Defender 200 TDI engine, with a Valeo clutch kit, fitted to an LT77 that I don't know the background too that was previously fitted to a Discovery 1 200 TDI engine.

I don't have pics.

Thanks
 
Pretty sure the LT77 fitted in a Discovery had an elongated bell housing compared to the Defender. If your gearbox is out of a Discovery and is now mated to a Defender 200Tdi then that might be the issue. Having said that I'd have thought you would have encountered engine mounting issues as the longer bellhousing pushes the engine forward. I've not dealt with this myself, just read about it.
 
Hi Dag, referring to the push rod from the slave cylinder it is passing right inside the housing and not working the fork.
I am still not following exactly what the problem is. The push rod should be attached to the end of the fork not the slave cylinder. It is common to cable tie the plastic clip to the end of the fork to prevent the push rod separating. And then when fitted the pushrod then extends through the hole for the slave cylinder. Both can be seen in the pic below (from Google, not mine)

1704772361171.jpeg


What exactly is the problem you have? As it should pass through the housing as seen?

Has the rod detached? If so it is possible, although very fiddly, to reattach the plastic clip with a set of long nose me needle nose pliers without splitting the gearbox, but you cannot then cable tie In Place.

Is the rod far too short and not protruding through the hole in the bellhousing? There are different sized rods but from Memory they are only about 5mm different in length so would still protrude through the hole and look the same but when the slave is fitted the clutch would not work as intended.

It was my understanding, although I am far from an expert that the difference between between a discovery and a defender gearbox is the selected housing on the top for the gear-lever positioning.
 
Last edited:
There must be a difference in slave cylinder as we somehow got the wrong one for my son's disco lt77 in his Ninety.
It also had a clutch damper thingy on it.
Sorry its a bit vague it was a few years ago.
 
Pretty sure the LT77 fitted in a Discovery had an elongated bell housing compared to the Defender. If your gearbox is out of a Discovery and is now mated to a Defender 200Tdi then that might be the issue. Having said that I'd have thought you would have encountered engine mounting issues as the longer bellhousing pushes the engine forward. I've not dealt with this myself, just read about it.
It does have a long bellhousing on a Disco box.
 
Pretty sure the LT77 fitted in a Discovery had an elongated bell housing compared to the Defender. If your gearbox is out of a Discovery and is now mated to a Defender 200Tdi then that might be the issue. Having said that I'd have thought you would have encountered engine mounting issues as the longer bellhousing pushes the engine forward. I've not dealt with this myself, just read about it.
Hi AI, the engine and gearbox slotted in perfectly to the new (MAER) chassis.
 
I am still not following exactly what the problem is. The push rod should be attached to the end of the fork not the slave cylinder. It is common to cable tie the plastic clip to the end of the fork to prevent the push rod separating. And then when fitted the pushrod then extends through the hole for the slave cylinder. Both can be seen in the pic below (from Google, not mine)

View attachment 307196

What exactly is the problem you have? As it should pass through the housing as seen?

Has the rod detached? If so it is possible, although very fiddly, to reattach the plastic clip with a set of long nose me needle nose pliers without splitting the gearbox, but you cannot then cable tie In Place.

Is the rod far too short and not protruding through the hole in the bellhousing? There are different sized rods but from Memory they are only about 5mm different in length so would still protrude through the hole and look the same but when the slave is fitted the clutch would not work as intended.

It was my understanding, although I am far from an expert that the difference between between a discovery and a defender gearbox is the selected housing on the top for the gear-lever positioning.
Hi Dag, excellent help many thanks. The rod is passing fully inside the housing, i.e. it is not protruding nearly enough to be pushed. It does sound like my rod is too short.

I will have a play around with set of long nose pliers tonight.

Thanks
 
Hi Dag, I've taken off the slave cylinder, had a play around with the pin which is for the moment still fixed to the fork and taken pics of the pin, pulled fully out and inserted. Does this look right in terms of what is left protruding?

The nuts on the bell housing are not torqued yet so if needed it can still be split, engine and gearbox are sitting on the mounts which have not been made up yet.

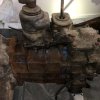
Pics also of the gearbox to possibly aid with identification.

Thanks again
 

Attachments

  • 337E64B6-7F5C-4688-8C4C-12BFB8759145.jpeg
    337E64B6-7F5C-4688-8C4C-12BFB8759145.jpeg
    67.4 KB · Views: 84
  • 5B1B638A-682D-497C-855C-0E3D49814012.jpeg
    5B1B638A-682D-497C-855C-0E3D49814012.jpeg
    68.5 KB · Views: 85
  • 02B445EA-FA37-439C-9660-A9FEA22CBCAD.jpeg
    02B445EA-FA37-439C-9660-A9FEA22CBCAD.jpeg
    79.4 KB · Views: 81
  • 09B9B995-A989-4076-BB4D-82FAEFEE3226.jpeg
    09B9B995-A989-4076-BB4D-82FAEFEE3226.jpeg
    95.7 KB · Views: 81
  • 6D52FB37-44F9-4709-BACD-AD2CEC770F42.jpeg
    6D52FB37-44F9-4709-BACD-AD2CEC770F42.jpeg
    86.8 KB · Views: 84

Similar threads