What its all about

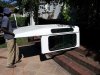
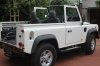
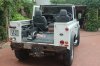
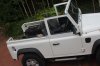
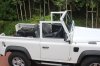
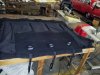
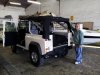
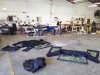
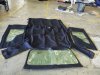
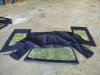
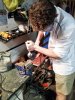
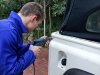
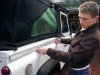
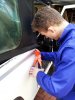
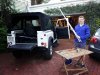
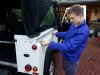
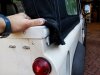
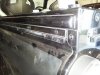
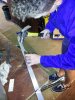
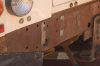
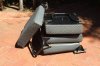
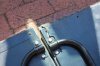
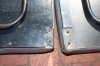
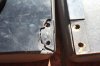
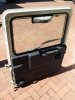
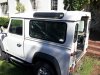
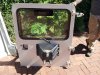
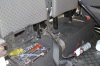
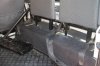
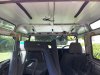
My dad and i are going to attempt to turn our 2004 90 into a soft top. I am a 16yr old from Cape Town, South Africa.Over the next two years i want to have this car ready for when i'm finally able to drive it legally. I plan to stuff it with every off roading piece of material gadget i can afford/find. Its gonna be loud
 
My landys from a man in George, living by the sea has played a bit of a toll on it but apart from surface rust, she's in pretty good nick.
 

Attachments

  • IMG_7763.jpg
    IMG_7763.jpg
    120.7 KB · Views: 213
RUST. going to take some time to get this all off but she;s gonna look good once its all off. the undersides also got a nice topcoat of it but nothing a couple of wire brushes cant handle.
 

Attachments

  • IMG_8145.jpg
    IMG_8145.jpg
    37 KB · Views: 248
  • IMG_8144.jpg
    IMG_8144.jpg
    35.8 KB · Views: 209
  • IMG_8143.jpg
    IMG_8143.jpg
    38.7 KB · Views: 204
  • IMG_8142.jpg
    IMG_8142.jpg
    71.2 KB · Views: 208
  • IMG_7751.jpg
    IMG_7751.jpg
    55.6 KB · Views: 199
Upon closer inspection of the car, we realised there were a couple of little issues with it, one being being we had bought pretty ****ty seats. the front to are manageable but our rear 4 weren't looking to happy.
 

Attachments

  • IMG_7768.jpg
    IMG_7768.jpg
    98.9 KB · Views: 201
  • IMG_7750.jpg
    IMG_7750.jpg
    81.9 KB · Views: 220
  • IMG_7749.jpg
    IMG_7749.jpg
    127 KB · Views: 225
  • IMG_7748.jpg
    IMG_7748.jpg
    105.6 KB · Views: 235
Just thought id let everyone know where im trying to go with this. I really like the SVX look, except im hoping to combine it with the slightly more tough, NAS aspect (not big fancy light surround kind of thing). have seen a couple of photos of landys with wooden decking (startech yachting edition i think..) and really want to incorporate that as well. having a bikini hood and a full canvas would be ideal, us Cape Town people have very hot summers! AM also using Plastidip to try blacken the wheels. if anyone has used it, please give some tips!
 
So stage 1 for us was to remove the rear door. i've never worked on cars properly before but its great how simple the design of the defender is. we were able to take the door off with relative ease but it is one job for a pair of ametuers.

Disconnecting the wiring leading into the door was easy, with the collection of wires connected to the door all being able to be disconnected by a connector located behind the back-right speaker panel. we didn't really think of that though, and put ourselves through the effort of removing the entire door panel unscrewing the hand grip and disconnecting all the wires before realising that the wires wouldn't fit through the hole they would need to, so we re-screwed and reconnected everything and only then discovered the door panel!
 

Attachments

  • 20130301_102359.jpg
    20130301_102359.jpg
    38.9 KB · Views: 179
  • 20130301_100602.jpg
    20130301_100602.jpg
    69.5 KB · Views: 200
  • 20130301_102341.jpg
    20130301_102341.jpg
    76.8 KB · Views: 187
Before we started tackling the roof, we knew we were going to be taking the seats out anyway so we figured it would be more practical to take them out to give ourselves more area to work with.

Removing the lower half was tricky with many of the bolts stuck because of the rust. It would be impossible to remove the seats without to people because you need someone holding the bolt underneath while someone at the top works with the socket. the backrests were easy because once you loosen them you can just slide them out
 

Attachments

  • IMG_7771.jpg
    IMG_7771.jpg
    127.2 KB · Views: 227
  • IMG_7770.jpg
    IMG_7770.jpg
    97.2 KB · Views: 175
Before we started taking the roof off we had to take out the roof lights and interior. The lights were easy, all you needed is a set of screwdrivers. the panels were all relatively easily as well with most popping off nicely. for the trickier areas which wouldnt pop off, we just wedged and levered them off with a big flathead screwdriver
 

Attachments

  • 20130301_102315.jpg
    20130301_102315.jpg
    36.7 KB · Views: 157
  • 20130301_103020.jpg
    20130301_103020.jpg
    56.5 KB · Views: 179
  • 20130301_100614.jpg
    20130301_100614.jpg
    51.1 KB · Views: 175
Tidy 90 you've got there - very little rust too!

Good choice going soft top, you won't regret it ;)
 
Now that we'd stripped the interior, we set about unscrewing everything holding the roof in place. This was actually relatively easy. We took off the top and the sides off together instead of doing it individually. We tried lifting it off after unfastening everything and it all came free except for some glue which held the front of the roof to the windscreen. thinking it was a mysterious set of bolts hidden somewhere behind the metal folds. we found nothing and eventually just stuck screw driver between the it and were able to un-stick it. After that, the roof came off like a charm. Car looks very sexy without a roof and am wondering if we should just leave it like this!
 

Attachments

  • 20130301_101845.jpg
    20130301_101845.jpg
    41.8 KB · Views: 196
  • 20130301_100905.jpg
    20130301_100905.jpg
    69 KB · Views: 179
  • IMG_8146.jpg
    IMG_8146.jpg
    84.7 KB · Views: 192
  • IMG_8147.jpg
    IMG_8147.jpg
    113.4 KB · Views: 253
  • IMG_8148.jpg
    IMG_8148.jpg
    75.4 KB · Views: 230
  • IMG_8149.jpg
    IMG_8149.jpg
    110 KB · Views: 184
my dad became besties with a guy he met who was driving around in an SVX while he was on his bike. My dad asked him a bit about his car and it just happens that he has a spare SVX roll cage plus and spare SVX tailgate all just lying around in his house (what are the chances, considering there are only about 10 SVX's in South Africa). To top it all off, the owner, Sean, gave it to us at an amazing discount because he was moving and wanted the stuff out of his house.
So here we have it, the roll cage (minus the front bar over the windscreen, which we're gonna have to get made) plus the tailgate :D being on a pretty tight budget this is such a bonus.
SO EXCITED.
 
sorry that havent replied in ages, laptop got stolen as my exams started so been hectic last few weeks, will be giving a flood of new developments!
 
So the Svx hood we got has a little snag in it. it has no front part....the rear, with roof, windows and tailgate flap are all there but the front has been cut off. this is a bit of a mixed blessing. We had to go to a trimmmer to get the mohair material and for him to make something that will discretely connect to our existing material and make it all line up and fit on our roll cage, which takes time in garage (which leads to scratches and bumps on the car) and money.

The plus side though, it has given us the opportunity for us to make the hood very versatile. we got the trimmer to join the front and rear by a zip instead of stitching them together meaning we can now have a bikini option for the car as well which will suit cape towns sunny climate perfectly!

i have included a pic of our hood plus a complete svx hood which we borrowed from the man we got it from so the trimmer would be be able to replicate it. there is also a pic of the bikini part which he created with the holdfast straps on top of it.
 

Attachments

  • 20130423_093903.jpg
    20130423_093903.jpg
    62.1 KB · Views: 308
  • 20130424_120010.jpg
    20130424_120010.jpg
    67.1 KB · Views: 266
  • 20130320_154236.jpg
    20130320_154236.jpg
    73.2 KB · Views: 182
  • 20130320_154434.jpg
    20130320_154434.jpg
    58.5 KB · Views: 197
  • 20130320_154416.jpg
    20130320_154416.jpg
    58.5 KB · Views: 198
One of the issues with the hood is that it is designed to fit and SVX, which has aluminium profiles on the side to hook into. this keeps the horizontal tension and stops all that irritating flapping. we took it upon ourselves to create our own profiles, so we bought a few metres of 3mm aluminium and 6mm aluminium. the plan was rivet the 6mm on to the car first, which would provide the strength and then the 3mm on top of that so that the hooks on the hood would be able to slide under it. the 3mm was longer than the 6mm.

we didn't have any real idea of what we were doing except for on for two pics we had seen on the svx. luckily because all defenders are basically the same, there was an issue of space for the aluminium rail to fit.

we first made a prototype to see if it would work and found that the 3mm was too thick fro the plastic clip of the hood to fit under. this meant that we had to grind it down till it was just thin enough for the hood clips to fit snugly.

eventually, after much grinding, we were able to drill the holes and fit it onto the car. everything worked nicely and the next step was take it off so that we could paint it!
 

Attachments

  • 20130611_152457.jpg
    20130611_152457.jpg
    81.3 KB · Views: 216
  • 20130611_163012.jpg
    20130611_163012.jpg
    71 KB · Views: 224
  • 20130615_114736.jpg
    20130615_114736.jpg
    59.6 KB · Views: 245
  • 20130615_150752.jpg
    20130615_150752.jpg
    61.5 KB · Views: 233
  • 20130615_162952.jpg
    20130615_162952.jpg
    102.6 KB · Views: 293
  • 20130615_163018.jpg
    20130615_163018.jpg
    71 KB · Views: 216
  • 20130617_100054.jpg
    20130617_100054.jpg
    46.3 KB · Views: 249
  • 20130320_092216.jpg
    20130320_092216.jpg
    59.2 KB · Views: 253
  • 20130615_143649.jpg
    20130615_143649.jpg
    65.4 KB · Views: 222
Nice work there.

I like the idea of an adaptable hood full soft/bikini connected by a zip..... Am planning to do something similar for mine later in the summer. Keep the pics coming!
 

Similar threads