Ziva

Member
Dear All,

I am in the middle of a complete rewiring project, I preferred to rewired the whole car rather than fix the 35 years old wiring.

I would like to use as much as possible DT connectors, but I would like to know how to do the followings:

  1. let say I have one positive feed for example for the rear lights that I need to connect to two wires on the other side. how do you do it? for example I come from the fuse panel with one wire for the rear lights and need to connect two wires on the other side (left and right)?
  2. what is the maximum gauge or mm2 for each wires in the DT connectors? can I run multiple 2,5mm2 into one plug with let say, 6 pins?
Thank you all for your help.
 
Thanks a lot, for bullet connectors, I knew some double ones existed. but DT connectors are waterproof and can have a lot more "pins". so this is why I wanted to stay in that root.
 
I'm in the process of slowly converting every bullet crimp connector to Deutsch DT series (For anyone interested, more info here: DT Series Tech Specs)

I knew them from a previous life and decided to fit them wherever possible on the 110 that is currently undergoing resto. Landyzone thread here.

For any cable split into two directions it will be a simple strip/solder/heatshrink approach for now. Both the DT 16 awg/1.5mm and 14 awg/2.5mm terminals will take 13 amps per contact and there is a 12 awg/4mm connector range that will take 25 amps. This should be more than enough for a 90/110.

Edit: There are DT Bussed connectors available...this is new to me so will investigate if they can replace a simple splice.

I do have some 8 awg Deutsch connectors sitting on the shelf "just in case they come in handy". They will take 60 amps...but not found any need for them - yet.

Hope this helps?
 
Last edited:
No thanks, i'll stick with the Lucas connectors, trying to find a cable fault in a fiddly 6 or 8 wire connector doesn't sound like fun.

My father would turn in his grave with the thought of fitting German connectors to a Landrover ...
 
I'm in the process of slowly converting every bullet crimp connector to Deutsch DT series (For anyone interested, more info here: DT Series Tech Specs)

I knew them from a previous life and decided to fit them wherever possible on the 110 that is currently undergoing resto. Landyzone thread here.

For any cable split into two directions it will be a simple strip/solder/heatshrink approach for now. Both the DT 16 awg/1.5mm and 14 awg/2.5mm terminals will take 13 amps per contact and there is a 12 awg/4mm connector range that will take 25 amps. This should be more than enough for a 90/110.

Edit: There are DT Bussed connectors available...this is new to me so will investigate if they can replace a simple splice.

I do have some 8 awg Deutsch connectors sitting on the shelf "just in case they come in handy". They will take 60 amps...but not found any need for them - yet.

Hope this helps?
Thanks a lot Simon, do you have a reference for the bussed connector? I can only find this one

DT04-08PA-P021


but this is not in the general brochure. I think it will be a really good way of going about.

Thanks,
 
Thanks a lot Simon, do you have a reference for the bussed connector? I can only find this one
I don't I'm afraid, apart from those shown on page 9 of the PDF link above.

Frustratingly they do not do a three way split. But the 4 way looks useful.
 
I don't I'm afraid, apart from those shown on page 9 of the PDF link above.

Frustratingly they do not do a three way split. But the 4 way looks useful.
I do not see a lot of needs for those split connectors, except, for the way I rewired the car:
1) from the rear to the front with a 12 pins plug, that would be great (using trailer cables, you have everything you need)
2) from the fuse box to the front, one central core cables and then splitter into two, left, right.
3) for the indicators also

The problem seams to always be the one to x? I connect think of a way to avoir those, i could run multiple cables to the fuse box and then use a fuse box but i cannot find one which accept two to one either.

What did you do on yours regarding this?
 
The problem seams to always be the one to x? I connect think of a way to avoir those, i could run multiple cables to the fuse box and then use a fuse box but i cannot find one which accept two to one either.
I think it would be possible to use a bussed 4-way connector. 3 of the cable entries could be used, and the 4th one filled with a blanking plug - which are available.

Like these: DT Blanking Plugs

I have not got to a point where I need to make decision...but its one way forward.
 
indeed, blanking plugs are useful can always be used afterwards as a pin. my problem is more the other way around, I want to joint two pin to one wire and I am scratching my head to find a solution.
 
Hi All,

I think i just found what i was looking for, i post here the reference is someone is searching again for those connectors:

DT04-6P-EP14​


These are called DT bussed connectors, they have an array of different possibilities in the number of « bussed » ports (pins).

As a reminder, i will use those, to run for example, from the new fuse box to the rear lights where you have one fused circuit but two lights, just one plug and you are good. One one side this bussed connector and one the other side for each lamps, just a simple DT connector.


I will try to make a drawing and some photos to help you to understand.
 
By the time you've bought all these connectors your car will have doubled in value ... :)
 
Last edited:
Thanks a lot, for bullet connectors, I knew some double ones existed. but DT connectors are waterproof and can have a lot more "pins". so this is why I wanted to stay in that root.
Just to throw another spanner in the works why have you chosen DT connectors rather than AMP econoseal connectors which do the same things, are a modern multi pin waterproof connector, and more importantly are what land rover used themselves in the defender from halfway through the 300tdi? This would mean that land rover parts are directly compatible with your new wiring.

I know they are not cheap, but are you also aware that it is possible to buy complete new looms. I recently replaced all three looms in my 110 after a fire. Even if you are not looking to buy the full loom autosparks sells parts and connector, and also have the smaller auxiliary looms for sale like the dash, heater etc.
 
Just to throw another spanner in the works why have you chosen DT connectors rather than AMP econoseal connectors which do the same things, are a modern multi pin waterproof connector, and more importantly are what land rover used themselves in the defender from halfway through the 300tdi? This would mean that land rover parts are directly compatible with your new wiring.
This has occured to me and my DT choice. From a previous life, I had worked with the Deutsch stuff and found it easy to work with and very reliable.
The AMP stuff I was aware of and the fact the 300tdi used em was another up vote too. If the DT route persists I have already made a mental concession to fit a 300tdi coolant sensor, which has I think a built in econoseal connector. I have already sourced a Caterpillar (extensive DT user) oil pressure switch.

Right now I am designing the harness for all the additions that will be added over time; heated mirrors, seats and windscreen, rear work lights, cooling fan switch, USB ports etc, and its only at schematic stage so its up for grabs as to how the actual physical wiring will manifest itself. So a switch to Econoseal could still happen. The whole setup is likely to be very modular so big things like the whole rear body can be disconnected with a single, or maybe two, connectors...but we shall see how far that purist mindset goes.

To misquote a line from Mad Max..."Reliablity is just a question of money. How long do you want it to last?" is the kind of ethos...and that could be satisfied by Deutsch or AMP. I need to watch myself and check for OCD here...it can get obsessive!

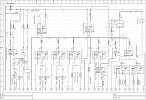
Schematic attached...any fault finding welcome.
 

Attachments

  • Screenshot 2025-06-13 at 08.20.14.png
    Screenshot 2025-06-13 at 08.20.14.png
    165.4 KB · Views: 5

Similar threads